At the end of June, Elite: Dangerous finally released on PlayStation 4. The space simulator has welcomed a lot of new commanders under its wings. Not long before that, there was a huge content patch that also changed a lot about one of the core parts of the game: exploration. With all of that in mind, here is an Elite exploration guide for budding explorers. We’ll cover what you need to get started exploring, some tips, and how to make money exploring.

Exploration can be one of the most rewarding experiences in Elite: Dangerous. However, you do need a few things to get started. First of all, make sure you’re prepared for a long journey. I’ve described my month-long journey across the galaxy before. Even when you’re fully prepared for your trip it can still feel like an awfully long time. You won’t be able to take part in community goals, you won’t be able to fly with your friends, and you won’t be able to get that combat fix you’re itching for.
Getting Started Exploring in Elite
Let’s say you’re ready to take on this extensive trip. What ship is best for exploration? You basically want to maximize your jump range, while also fitting all the necessary exploration modules. It is possible to take a Cobra Mk III or a Hauler, fitted for exploration, and get out there pretty quickly. You could even start right away with a Sidewinder. However, your best bet is to fit a Diamondback Explorer (1.89 million credits), or an Asp Explorer (6.6 million credits). I personally fly an Asp and I will explain why in a moment. Eventually, you may want to aim for an Anaconda. Keep in mind, however, they are around 147 million credits base price. That's not including all the modules you’ll want to equip.
To explore, you technically only need a Discovery Scanner. I strongly recommend picking up an Advanced Discovery Scanner rather than either the Basic or Intermediate. This affects the range at which you can scan, and an Advanced Discovery Scanner (also known as the D-Scanner) will identify all the astronomical objects in your current system. The other two are severely limited by range. It’s a substantial initial investment for a new pilot but it’s definitely worth it.
You will also want to pick up a Detailed Surface Scanner. While you can scan objects with your default ship scanner (this gives you credit if you’re the first time discoverer of an object!), a Detailed Surface Scanner gives much more information about an object and increases the payout significantly. All other modules are up to you, but the only other requirement is that you have a Fuel Scoop. The bigger, the better! Where you’re going, there won’t be any fuelling stations, so you’re going to have to scoop your fuel from stars.
Diamondback Explorer vs Asp Explorer for Exploration
Commanders are currently discussing whether the Diamondback Explorer (affectionately known as the DBE or DBX) or the Asp Explorer (or Asp for short) is more effective for exploration. Each ship has pros and cons, so let’s take a look at them.
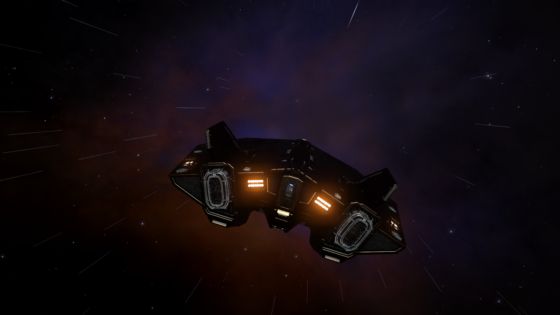
The Diamondback Explorer is significantly cheaper (around 4 - 5 million cheaper when fully fitted out). It has comparable jump range to the Asp, and has excellent heat management. This means you’re less likely to overheat if you accidentally get a little too close to a star. However, the Asp has a much better spread of internals, allowing for a bigger Frameshift Drive. Perhaps more importantly, commanders flying an Asp can fit a much larger Fuel Scoop. It’s also worth noting that the Asp’s viewport is expansive, allowing for a lovely internal view of the interesting things you find whilst exploring. You can mitigate this, however, by simply using the external camera in any other ship.
Which ship should you choose? That’s up to you. I personally prefer the Asp Explorer, but both ships are fantastic and fit their purpose well. If you’re just getting started, taking the Diamondback Explorer will be much cheaper and will allow you to figure out if exploration is for you without the slightly higher initial cost of the Asp.
What does an Elite explorer actually do?
If you’re completely new to Elite: Dangerous, exploration can seem a bit odd. It basically involves jumping from system to system and scanning for undiscovered planets and other astral bodies. Each object is worth a certain amount of credits, and when you return from your journey you sell the data you’ve scanned from these objects. Stations with “Universal Cartographics” services - which is most stations - will buy this data from you.
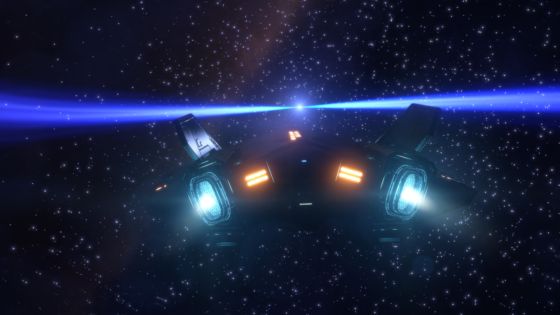
That’s all pretty basic, but what about the actual day-to-day life of an explorer? Some explorers will only go off to see interesting things that have already been discovered, such as taking long trips to the core of the galaxy to see the black hole there. Others will scan only high-value targets such as Earthlikes, Water worlds, Ammonia worlds, or similar. It’s up to you to forge your own path amongst the stars and decide what you want to do.
One way to get started is to set course for a random system in a random direction and just start jumping. If you aren’t sure you’re ready for a long journey, just go 1,000Ly and see how you feel. You can only plot up to 1,000Ly at the moment anyway, and if you’re still enjoying yourself you can set another destination a further 1,000Ly out and keep going. Pulse your D-scanner when you land in each system, scan anything that looks like it might be valuable, and move on.
How to Make Money Exploring in Elite

Making money as an explorer used to be pretty tough. The only people who really did it were those who had a passion for seeing the Milky Way through Elite or those who really wanted to get triple Elite ranking. Since 2.3, however, Frontier have drastically increased the exploration payouts, making it a truly viable career in Elite: Dangerous. Refer to the 2.3 payouts guide by CMDR Fru. This chart shows you exactly how much each object is worth and allows you to decide for yourself which you will take the time to do a detailed scan of. You can also make your own rule for how far you’re willing to fly in-system in order to scan these objects.
Personally, I will scan all Earthlikes, Water Worlds, and Ammonia Worlds, particularly if they’re undiscovered, out to 100,000Ls. I will scan High Metal Content worlds out to 10,000Ls if they’re undiscovered, but much shorter range if they’ve already been found before. The benefit of HMCs is that they have a chance to be a “candidate for terraforming”, which makes them significantly more valuable. This is determined by their distance from the star (and each star may vary) and may also be influenced by having Water Worlds or Earthlikes in the same system nearby.
Turning in the data you gained from scanning these objects at a station is what gets you credits and in turn, Elite rank. If you dedicate some time to jumping around and scanning you’ll find you make millions, though it is time-consuming and can be a bit lonely.
The Road to Riches
If you just want to earn credits, and you don’t care about first time discoveries, you can always do the “Road to Riches”. This is a series of high-value systems within the “bubble” (civilized space) that you can scan without going too far out. They’ve already been discovered and scanned by many commanders, but the route itself can be worth up to 300 million credits.
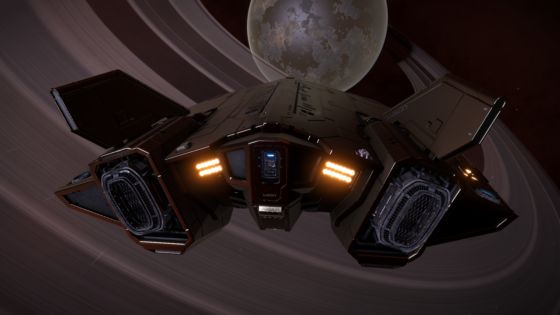
There are a few variations but this one by Redditor cold-n-sour is a good place to start. Feel free to browse around for other variations, but ultimately the purpose is to jump around within the local area and find high-value targets to scan, then sell the data up at the end. It’s what I plan to do to get me the last boost I need for Elite rating!
Exploration Tips and Tricks
Set your star class on the galaxy map to scoopable stars
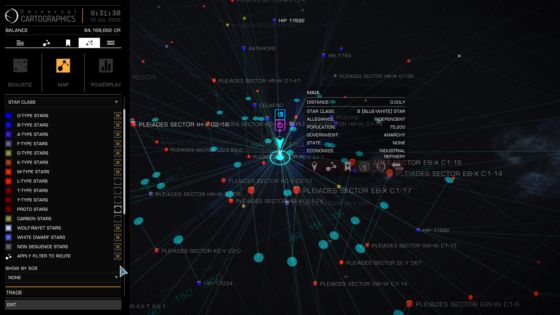
If you want to make sure you aren’t caught without any fuel, you can set your route to only include scoopable stars. Star types that are scoopable are K, G, B, F, O, A, and M type stars. To enable only scoopable stars, just open up the “View” tab on your galaxy map, and check only those stars. A good way of remembering the star classes that are scoopable is “Oh Be A Fine Girl/Guy Kiss Me”. You can also click “Apply to Route” to add only the selected star classes to your route from now on. I also personally check the Non-Sequence Stars, Wolf Rayet, and White Dwarfs because they’re often interesting to visit and can be worth the credits! Some explorers will recommend only going to certain stars for interesting systems. Ultimately, that's up to you!
Be willing to move on without detailed scans in a low-value system
Some systems will not be worth scanning. Do not be like me and scan everything anyway because of completionism (unless you think you can do that). Save yourself the time and energy, and prevent an early stop to your journey due to burnout, by being ready to move on. If the system doesn’t look worth it, “honk” (use your D-scanner) and jump to the next one. I wish I’d done this on my way to Sgr A*. By 10,000Ly from Sol I felt space madness settle in. Scanning everything was tiring, and not worth it.
Set throttle to zero when jumping
When you make the jump to the next system, make sure your throttle is always at zero before you arrive. You don’t have a lot of wiggle room when jumping into a new system and a lot of people end up taking heat damage when they arrive in their next system because of this. Make sure to throttle down or have a keybinding for “Set throttle to 0%” and hit that every time the countdown finishes and you start jumping.
Bring along an Auto-Field Maintenance Unit for repairs on the go
Fitting an AFMU or two can be a real life saver. You can stop yourself from ending an exploration run prematurely due to ship damage. Commanders can use AFMUs to repair modules on the go. This means you won’t have to face Frameshift Drive malfunctions and other nasties if you happen to take heat damage due to bumping into stars a little too frequently.
Bring an SRV and planetary landing suite (optional)
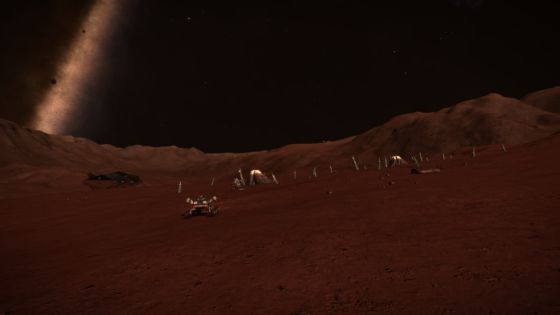
If you have Horizons, it might be tempting to get rid of your planetary landing suite and not bring along an SRV. However, the SRV has many benefits. First of all, it can give you a little change of pace on your journey, especially if you see an interesting landable planet with a beautiful backdrop. It’s a great opportunity for screenshots! You can also gather materials to synthesize FSD Injections to increase your ship’s jump range, and even AFM refills if you brought along an AFMU.
Set a hotkey for “Target next system in route”
While exploring, you’ll be targeting astral bodies often which takes focus from your next system in your route. Luckily, there is a “Target next system in route” hotkey in the controls. Simply select a button that works for you. When you’re done scanning a system press the hotkey (or use your voice command if you use VoiceAttack) and you’ll be ready to jump again immediately.
Take great screenshots to remember your journey
The new camera suite has a lot of functions that will make for wonderful exploration screenshots. Make sure you’ve set up your hotkeys appropriately. There is a lot to go through and many of the keybindings are unbound by default. After you’re in a nice position for a screenshot, turn off your HUD with the hotkey you just set up. Then press Alt-F10 for a high-resolution screenshot, or F10 for a regular screenshot. Of course, this will only work for PC!
Remember to call the Fuel Rats if you need them
If you run out of fuel and forgot to scoop, don’t panic! The Fuel Rats are here to help, no matter how far away you are. Rather than lose all that exploration data you just painstakingly scanned, contact them. A CMDR will come out to refuel you.
Closing Thoughts
There’s much more to exploration than I’ve included here, but this guide should help you get started. Exploration can be a slow and lonely career in Elite, but it can also be immensely rewarding. If you’re someone who loves space and wants to see as much of our galaxy as you’ll likely ever see in your life, Frontier has provided us with a way to do that.
If you have any other questions about exploration, feel free to ask us in the comments!