
This week we take a look at one of the more creative sides of Final Fantasy XIV. As Stormblood approaches, it's time to make sure we are fully prepared to capture the beautiful new lands, vistas and experiences we are about to encounter. If you’re new to the Group Pose or 'GPose' tool, or you're just looking for some extra tips, I hope this week's FFXIV column and screenshot tutorial can be a handy resource for you!
Getting the Most From Group Pose
This screenshot tutorial is part one in a set of creative articles looking at the in-game photography of Final Fantasy XIV. Today we will be looking at the in-game screenshot tool known as Group Pose or ‘GPose’ originally released in patch 3.4. Within this first screenshot tutorial, I will be guiding you through the basics of the Group Pose tool and then showing you how to create stunning images in-game using some of the basic settings, without the need for third party editing software. In future articles of this series, we will be taking a more in-depth approach and seeing what can be created with third party software and mobile apps.
Over the years, many of us have collected a vast array of screenshots from various games yet I’ve never quite been so dedicated to game photography as I am with FFXIV. I may perhaps have a slight obsession, to the point that they have to be moved to an external hard drive. To date, the folder is bursting with over 20k images and about 3k of those individually edited for publishing (yes, I know I am insane).
Although I have seen some other games offer similar screenshot functionality, like WoW’s ‘Selfie Camera’ or BDO’s screenshot mode, I’ve not seen as much expanded development through patch content like we are seeing here in FFXIV. The development team seems to be very fond of the tool and are continuing to expand its functionality. For a game that has such stunning vistas, variable lighting/weather conditions and expressive character emotes, this is a wonderful feature for many players. Not only does it give the game an added layer of depth but it becomes a artistic mini-game in itself.
Art inspired by video games is nothing new, but to have the game developers include content to actively encourage it is very special and means there is even more of a variety of content for people to enjoy. I’m always in awe when I glance down my Instagram feed to see the absolutely stunning, jaw dropping images players have created using Group Pose and other software.
In this article we’ll be looking at how to get the most out of the tool without using third party editing software. Before writing this article, I mostly edited with Picasa and a few other pieces of software, yet this has given me the opportunity to really explore and create things that I previously didn’t think possible (I’ve literally spent 12 hours in Group Pose!).
Group Pose
In the current incarnation (patch 3.5) we have the ability to control group and individual poses, camera angle (pan/tilt), depth of field, 3 modes of lighting (+RGB), limb darkening (+RGB), 10 screen effects, 17 color filters, NPC emote control, 5 status effects and 2 frames.
To begin with I will go through the basics of the Group Pose system including a visual gallery so that you are able to see some of the options available. Leading on from that, I’ll be showing you a few pieces created using various functions within the tool, including the settings I've used to create the shot so that you can see how the look was achieved.
Accessing Group Pose The Group Pose or Gpose interface can be accessed by typing ‘/grouppose’ or ‘/gpose’ and allows you to take greater control over your screenshots by allowing you to control the camera angle, freeze time and add effects.
Using the Camera Settings Window Once you are in Group Pose, the default key to access the camera settings window is R for PC or X (□) button for Gamepad. If you have already designated these keys to other functions, try pressing your button you have designated for Autorun. If you have trouble with this then it's best to take a look in your keybinds (Esc>Keybinds) and set it to something convenient.
Top Horizontal Bar Icons

Face Camera
The small eye icon appearing first on the left is the Face Camera function. This will not work when the character is paused. Upon first click this will turn your characters face (sometimes whole body depending on emote) to face the direction at which your camera is placed. On second click the character will turn to face the direction they were looking/had targeted prior to entering Group Pose. I believe this appears first in the list because the facing angle should ideally be set before the pause. However, if the characters are being frozen individually they can be selected by clicking on them. To change the viewing angle you would position your camera where you want them to look, click the Face Camera icon and then pause them again using Individual Pause.
To set a different expression during the emote, you must set this before entering Group Pose. First use the physical emote, use the expression, then type /gpose.
Lighting
The light bulb icon appears second from the left on the menu and is a toggle ‘on/off’ for the lighting settings that you will come to specify in the expanded lighting settings, of which there are three. My advice here would be to leave this one alone unless you are dumping a single light source somewhere with no RGB editing. If you toggle it by mistake it will reset your previously placed lights.
Group Pause
The icon on the third from the left with the ‘three person’ icon on it is the group pause action. This enables you to start and stop the animations of the entire group all at once.
 Here we see Novi and Ezekiel after performing a Pose and Ranger emote. They default to face the camera and are both paused together.
Individual Pause
The last icon, fourth from the left is the Individual Pause option. This pauses/unpauses your current selected target. This enables you to either target each person in the scene in turn and pause them individually, or pause the main group with the ‘group pause’ option and then target an individual and use the ‘individual pause’ to unpause them, then re-pause them in the desired pose. Be careful not to hit the ‘group pause’ again after setting up all of the individual pauses as this will reset them all.
[caption id="attachment_77700" align="aligncenter" width="560"] With the Individual Pause tool we have a little more control over the actions and positioning which can create more depth to an image.[/caption]
Reset tools are available on the top right.
Left Panel Tabs
[caption id="attachment_77685" align="aligncenter" width="560"]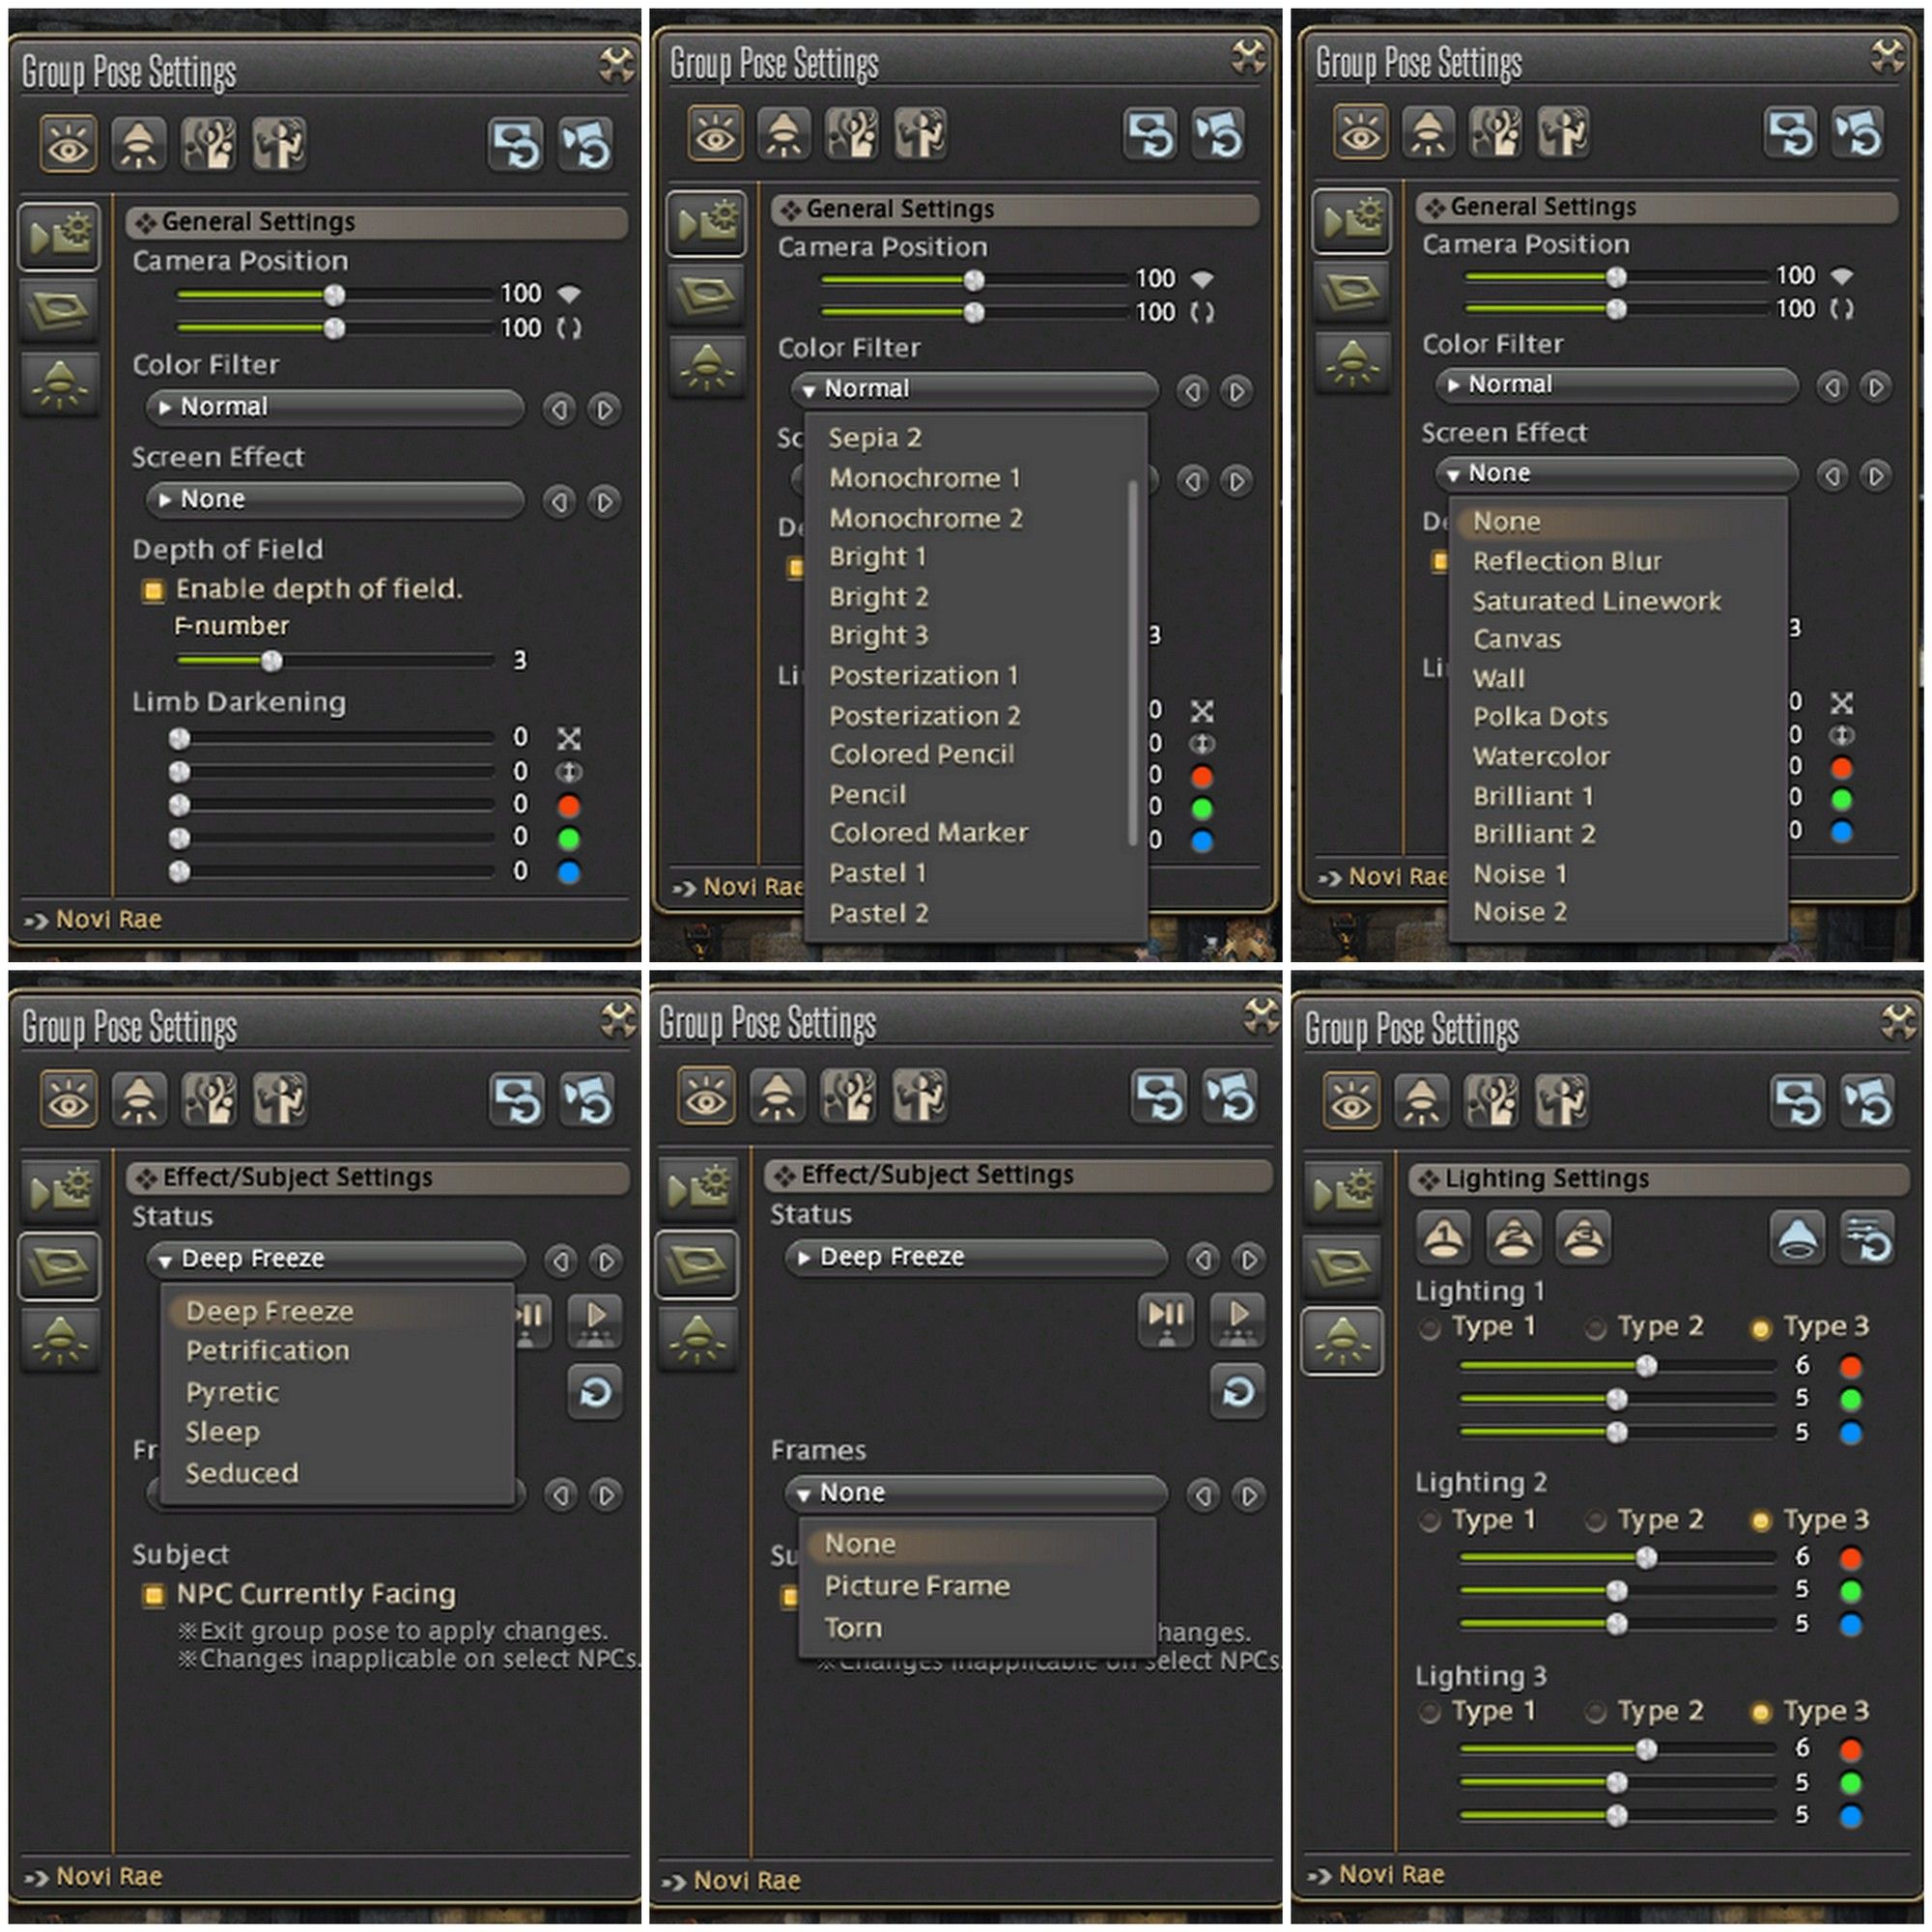 Click to enlarge.[/caption]
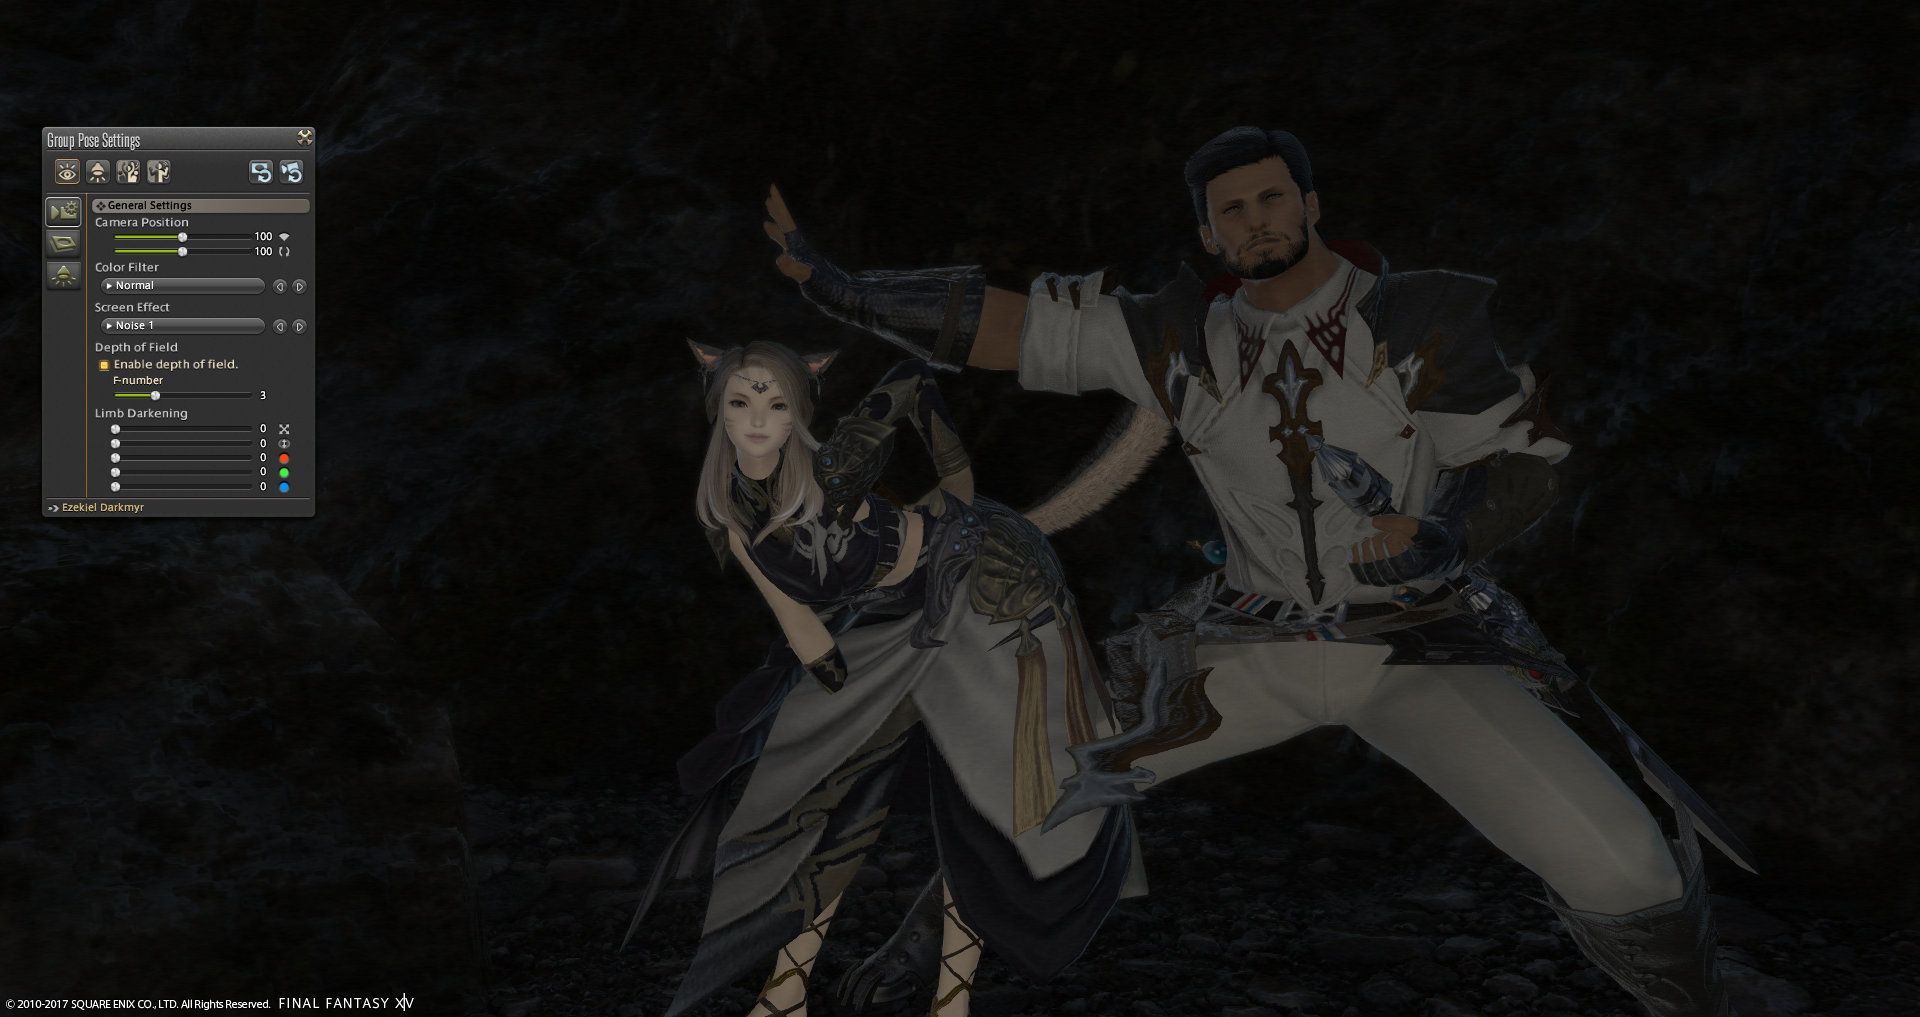
The icons on the left side of the interface are not individual commands in themselves, they represent a more extensive set of options.
General Settings
The camera and cogwheel icon represents the General settings. Within this menu you are able to adjust the framing of an image through zoom or rotation, the color filter, screen effects, depth of field (point of focus/blurry background) and limb darkening (vignette).
Camera Position: Adjust the zoom, pan and tilt. You can perform the tilt and zoom with the sliders however the pan is available using the A and D keys. The camera tilt is also available on the Q and E keys.
Colour Filter: Normal, Sepia 1-2, Monochrome 1-2, Bright 1-3, Posterization 1-2, Colored Pencil, Pencil, Colored Marker, Pastel 1-2, Echo, Aetherometer, Strengthened Effects.
Screen Effects: None, Reflection Blur, Saturated Linework, Canvas, Wall, Polka Dots, Watercolor, Brilliant 1-2, Noise 1-2.
[caption id="attachment_77691" align="aligncenter" width="560"] Click to enlarge.[/caption]
Screen Filter: None, Reflection Blur, Saturated Linework, Canvas, Wall, Polka Dots, Watercolor, Brilliant 1, Brilliant 2, Noise 1 & Noise 2.
[caption id="attachment_77692" align="aligncenter" width="560"]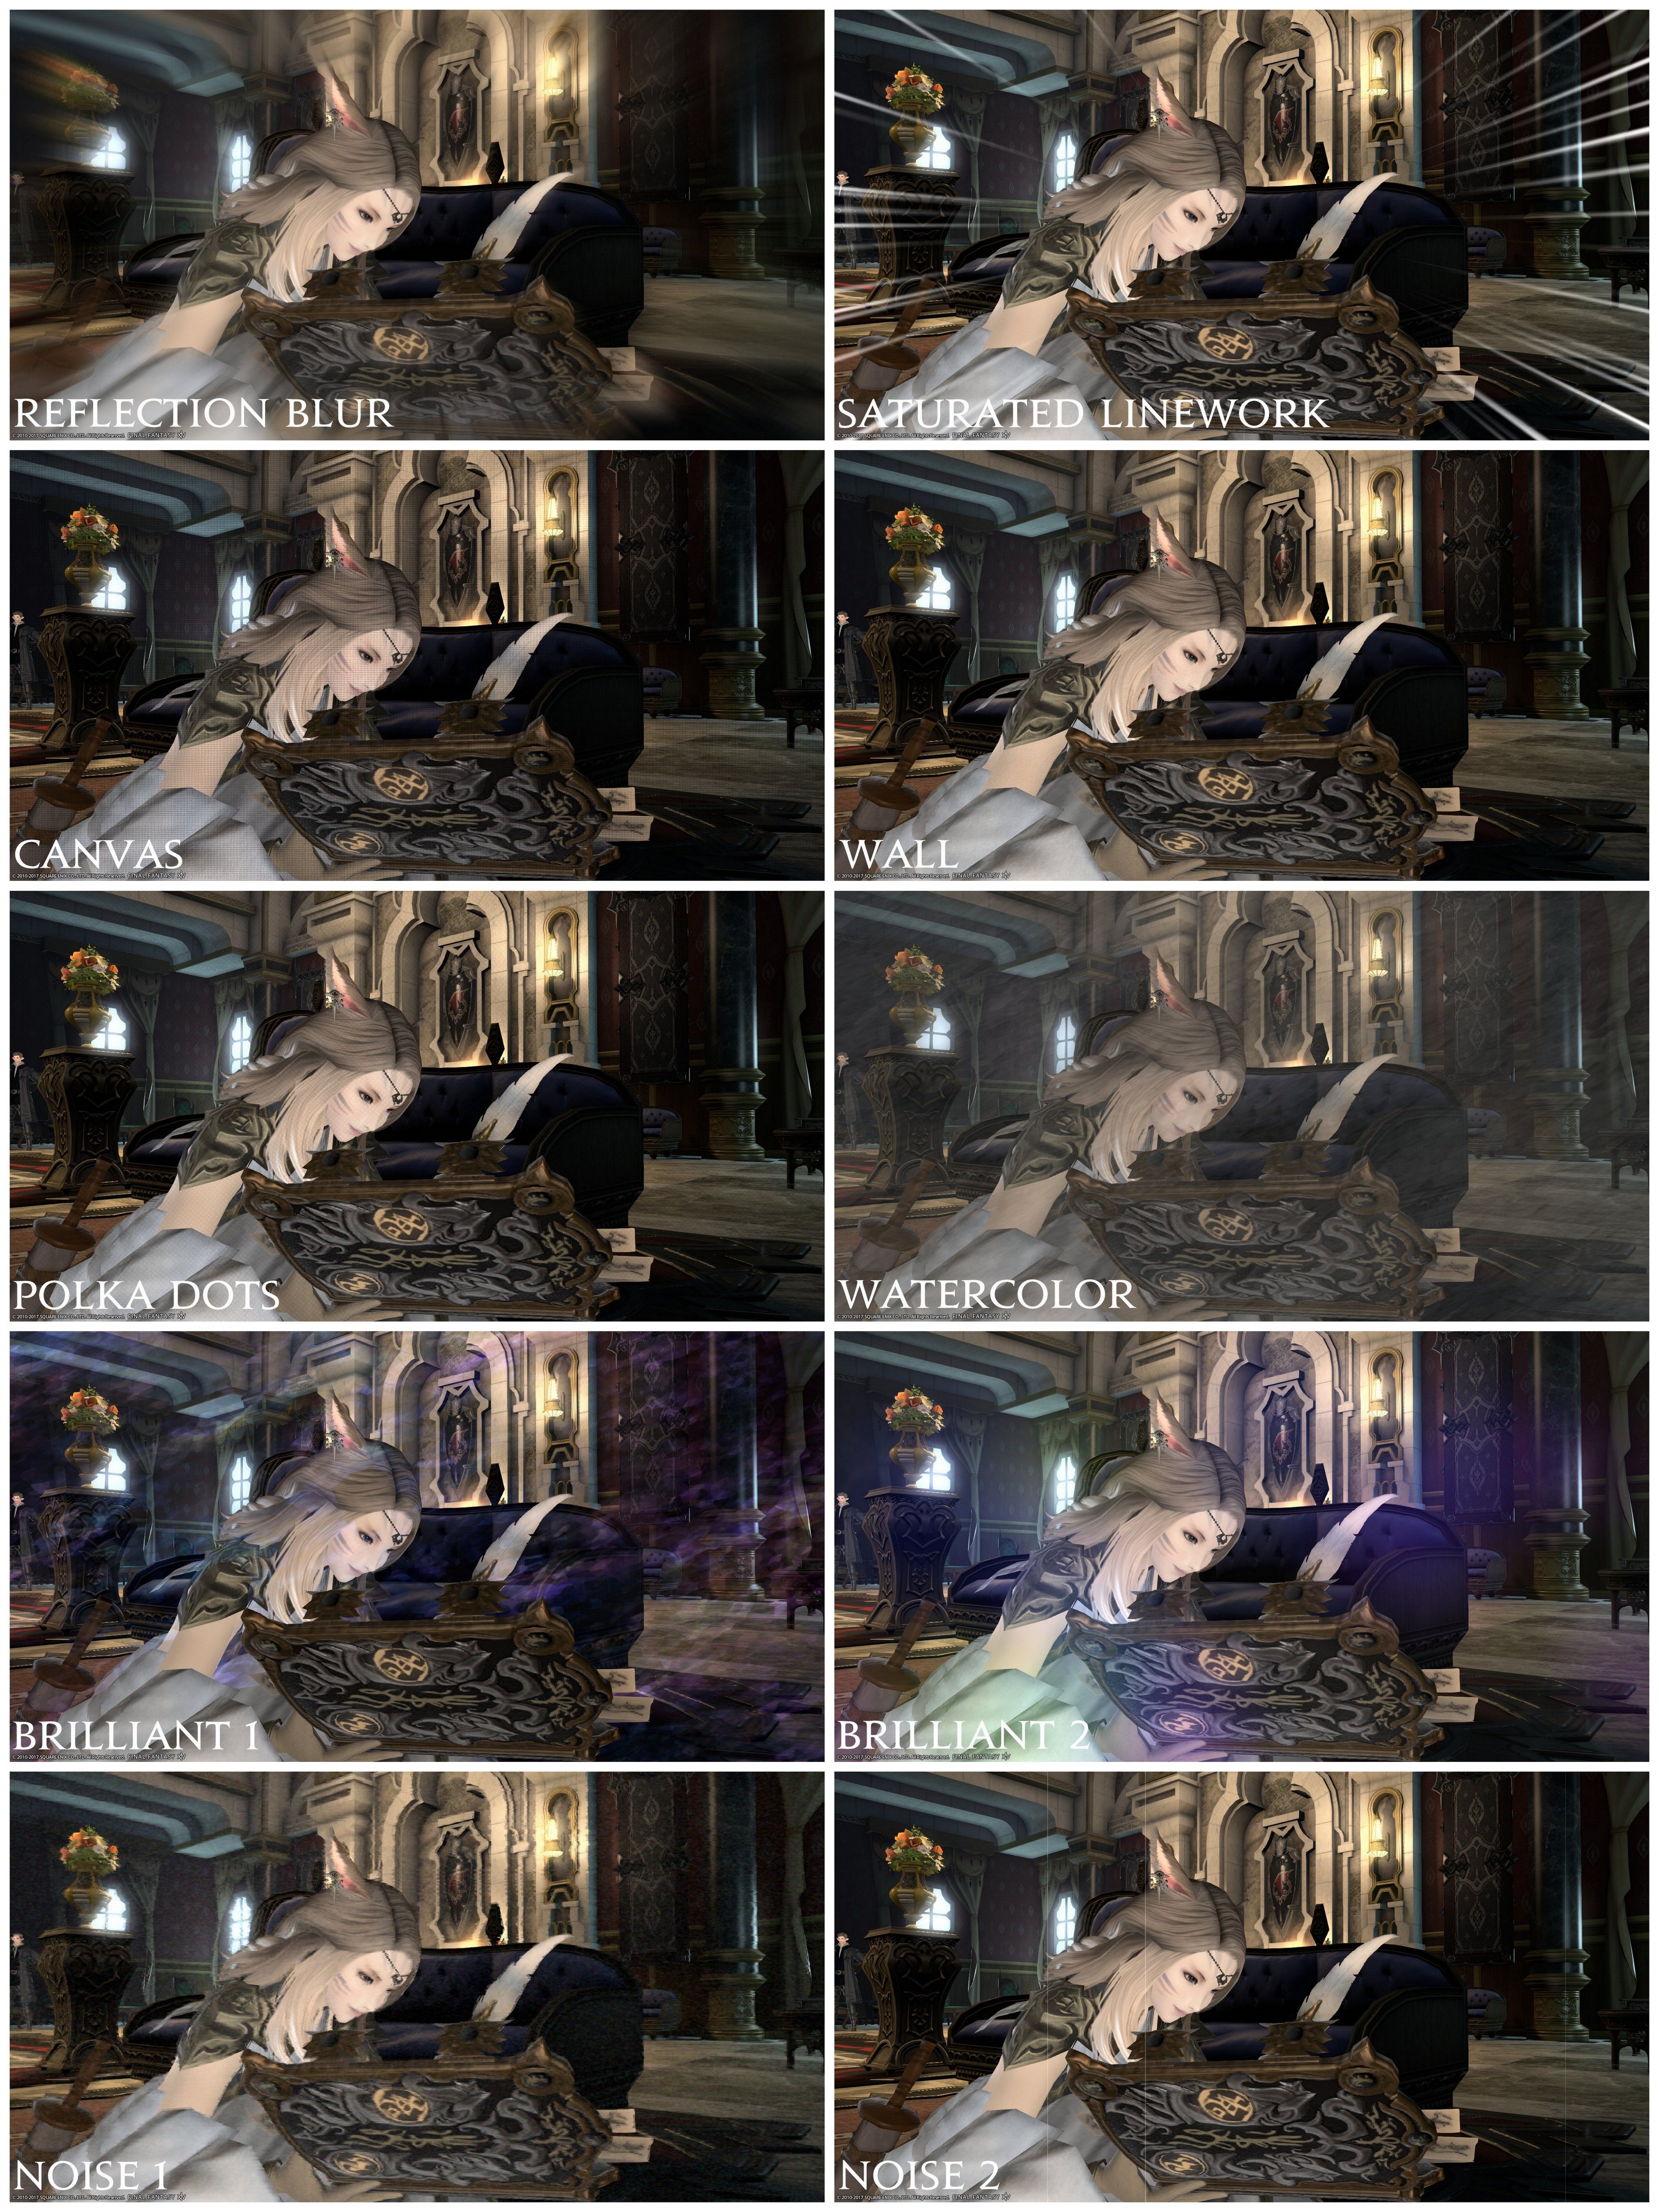 Click to enlarge.[/caption]
Effect/Subject Settings
Status Effects: Effects that mirror the effects of those placed upon your character during an encounter. Deep Freeze, Petrification, Pyretic, Sleep and Seduced.
[caption id="attachment_77697" align="aligncenter" width="560"]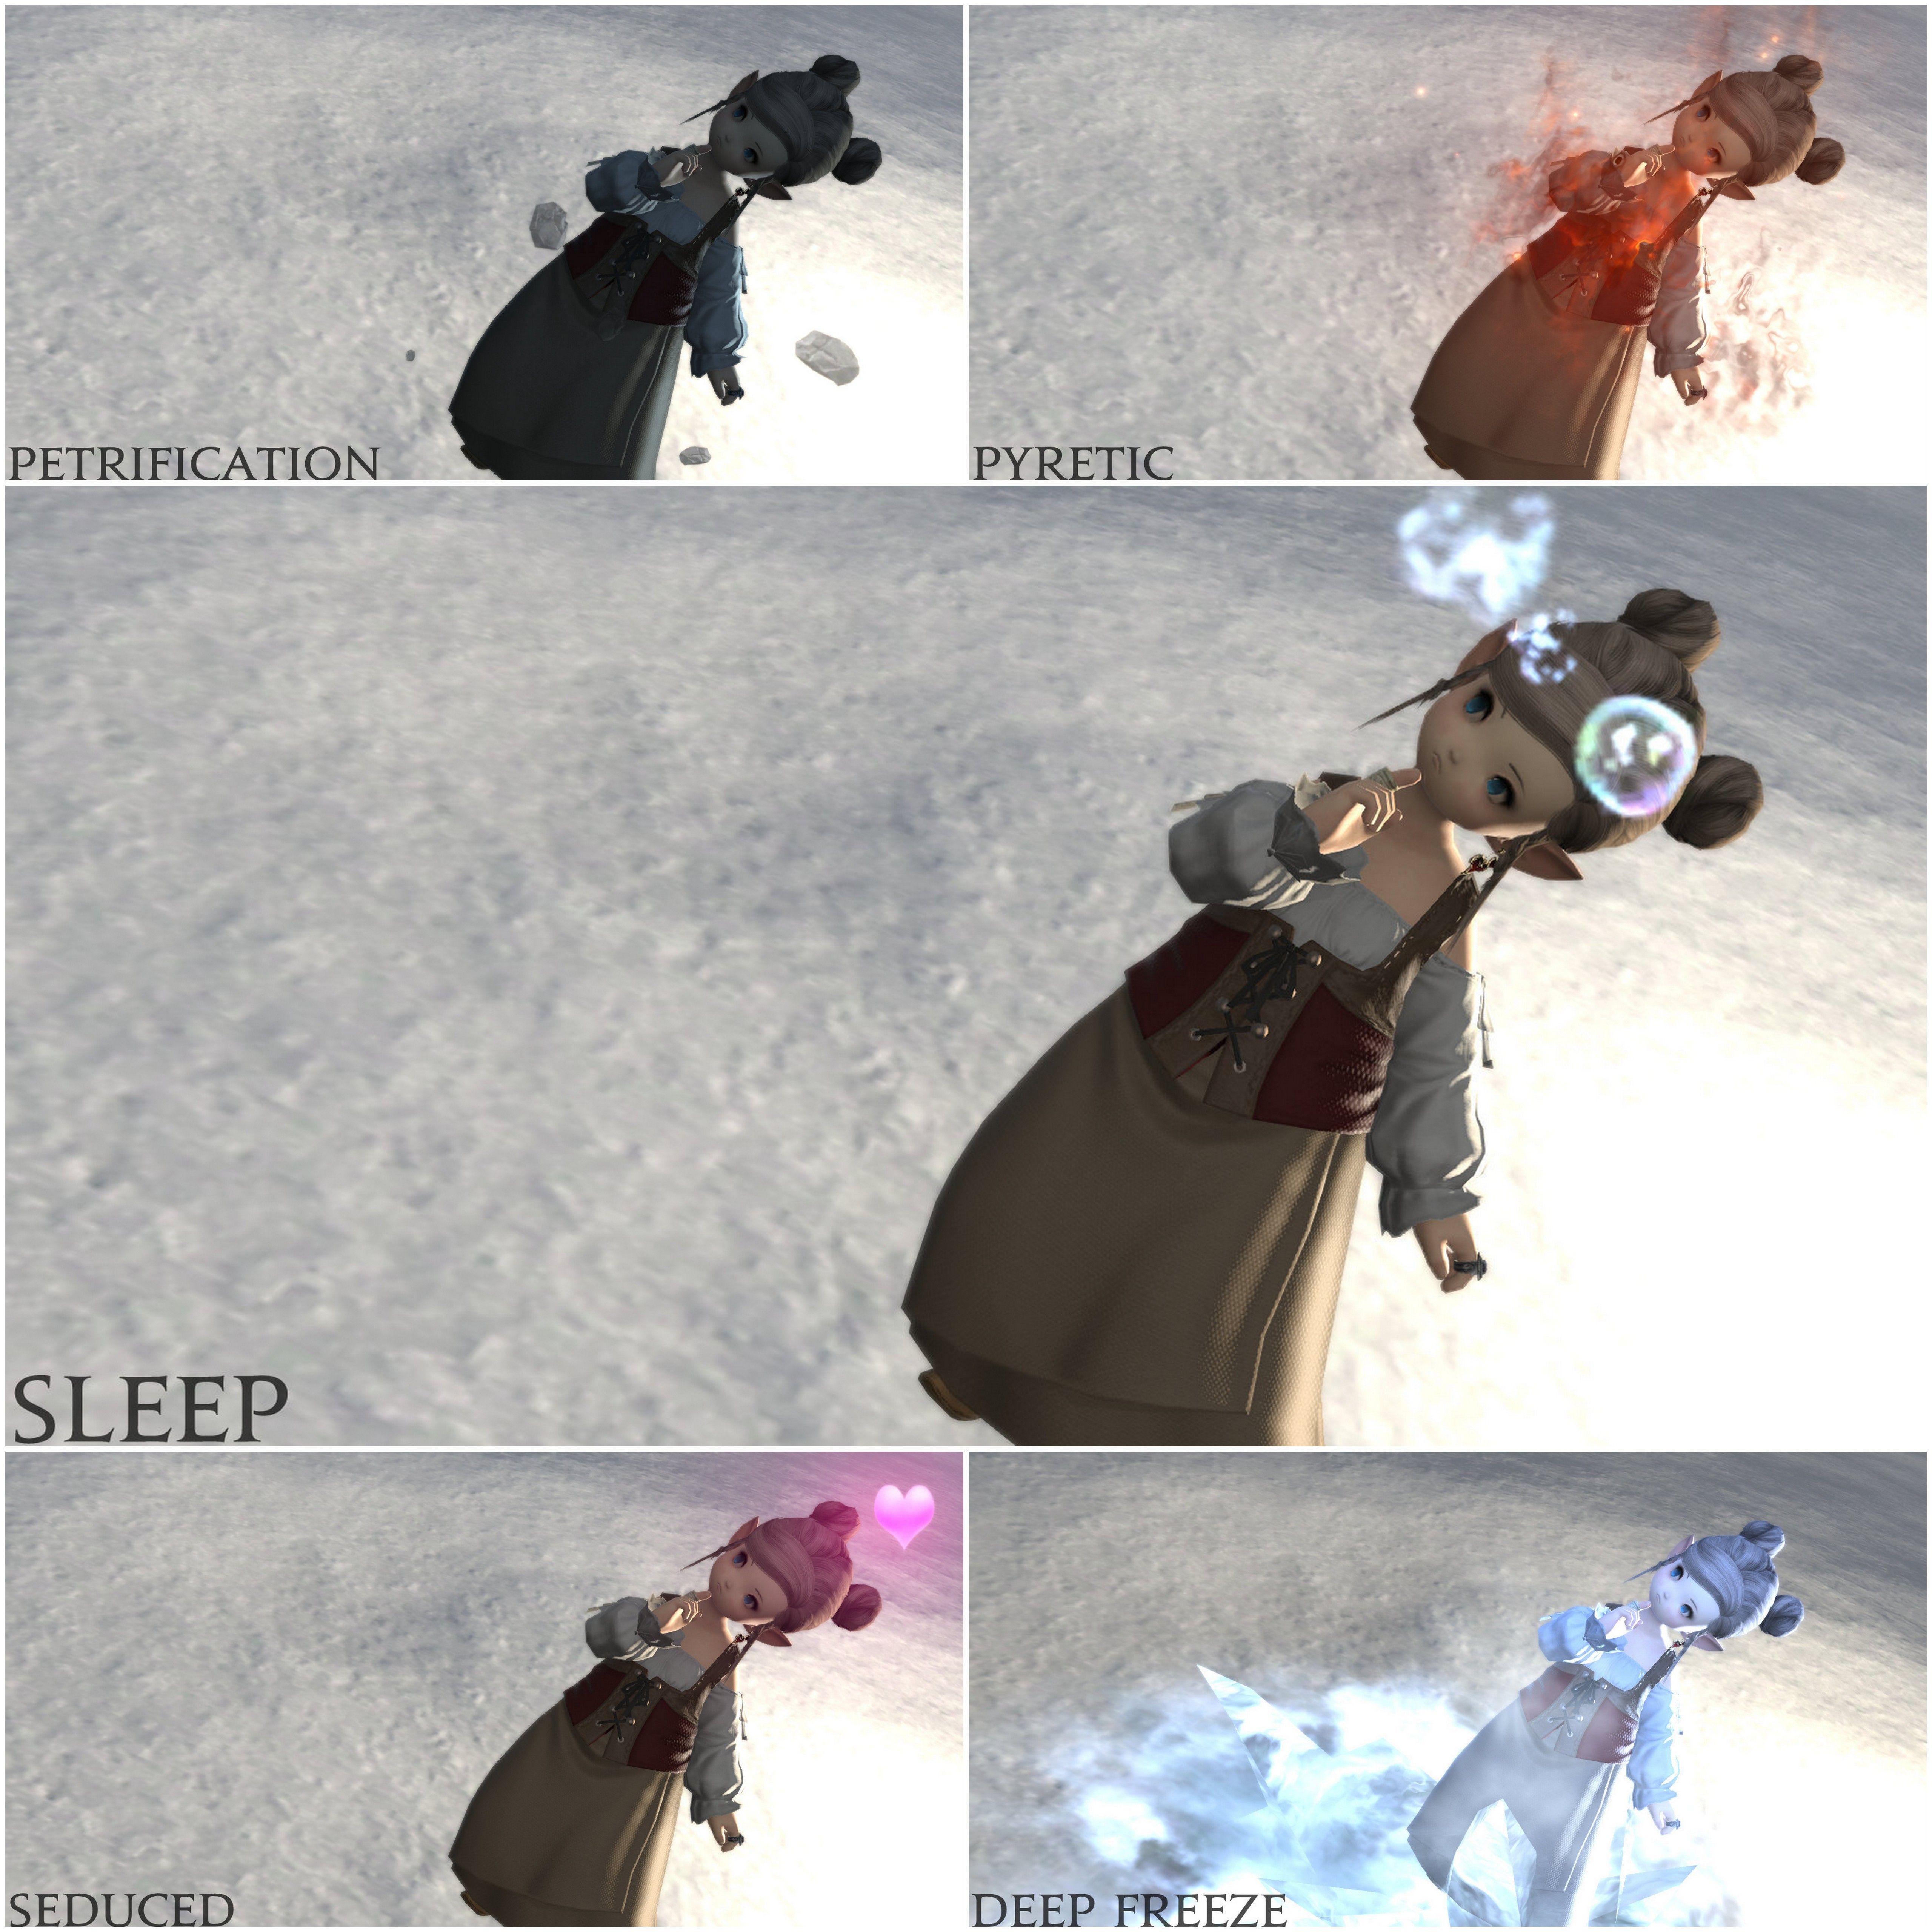 Click to enlarge.[/caption]
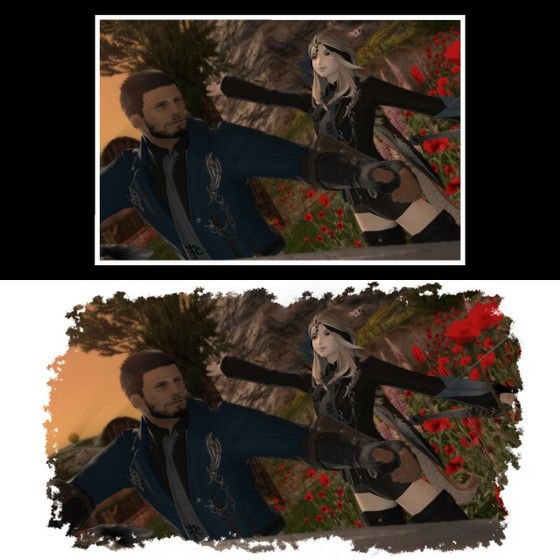
Frames:
None, Picture Frame and Torn.
Lighting Settings
The lighting tab has three separate lighting options, all of which have 3 variations in strength and individual RGB settings (red,green,blue) to adjust the lighting to your desired color. You can place each individual light source in different areas.The light will place where your camera is positioned in game, so if you do not want to overexpose your image, zoom as far out as possible, otherwise the intensity of the light can be altered using the ‘Type1-3’ settings. The lighting settings are notoriously difficult to place so don't be disheartened if it doesn't quite look how you imagine to begin with. Filters also interact with the lighting effects so it's a good idea to place your lighting source first, then have a look through the Color Filters/Screen Effects and then adjust your lighting to enhance the filters.
[caption id="attachment_77687" align="aligncenter" width="560"]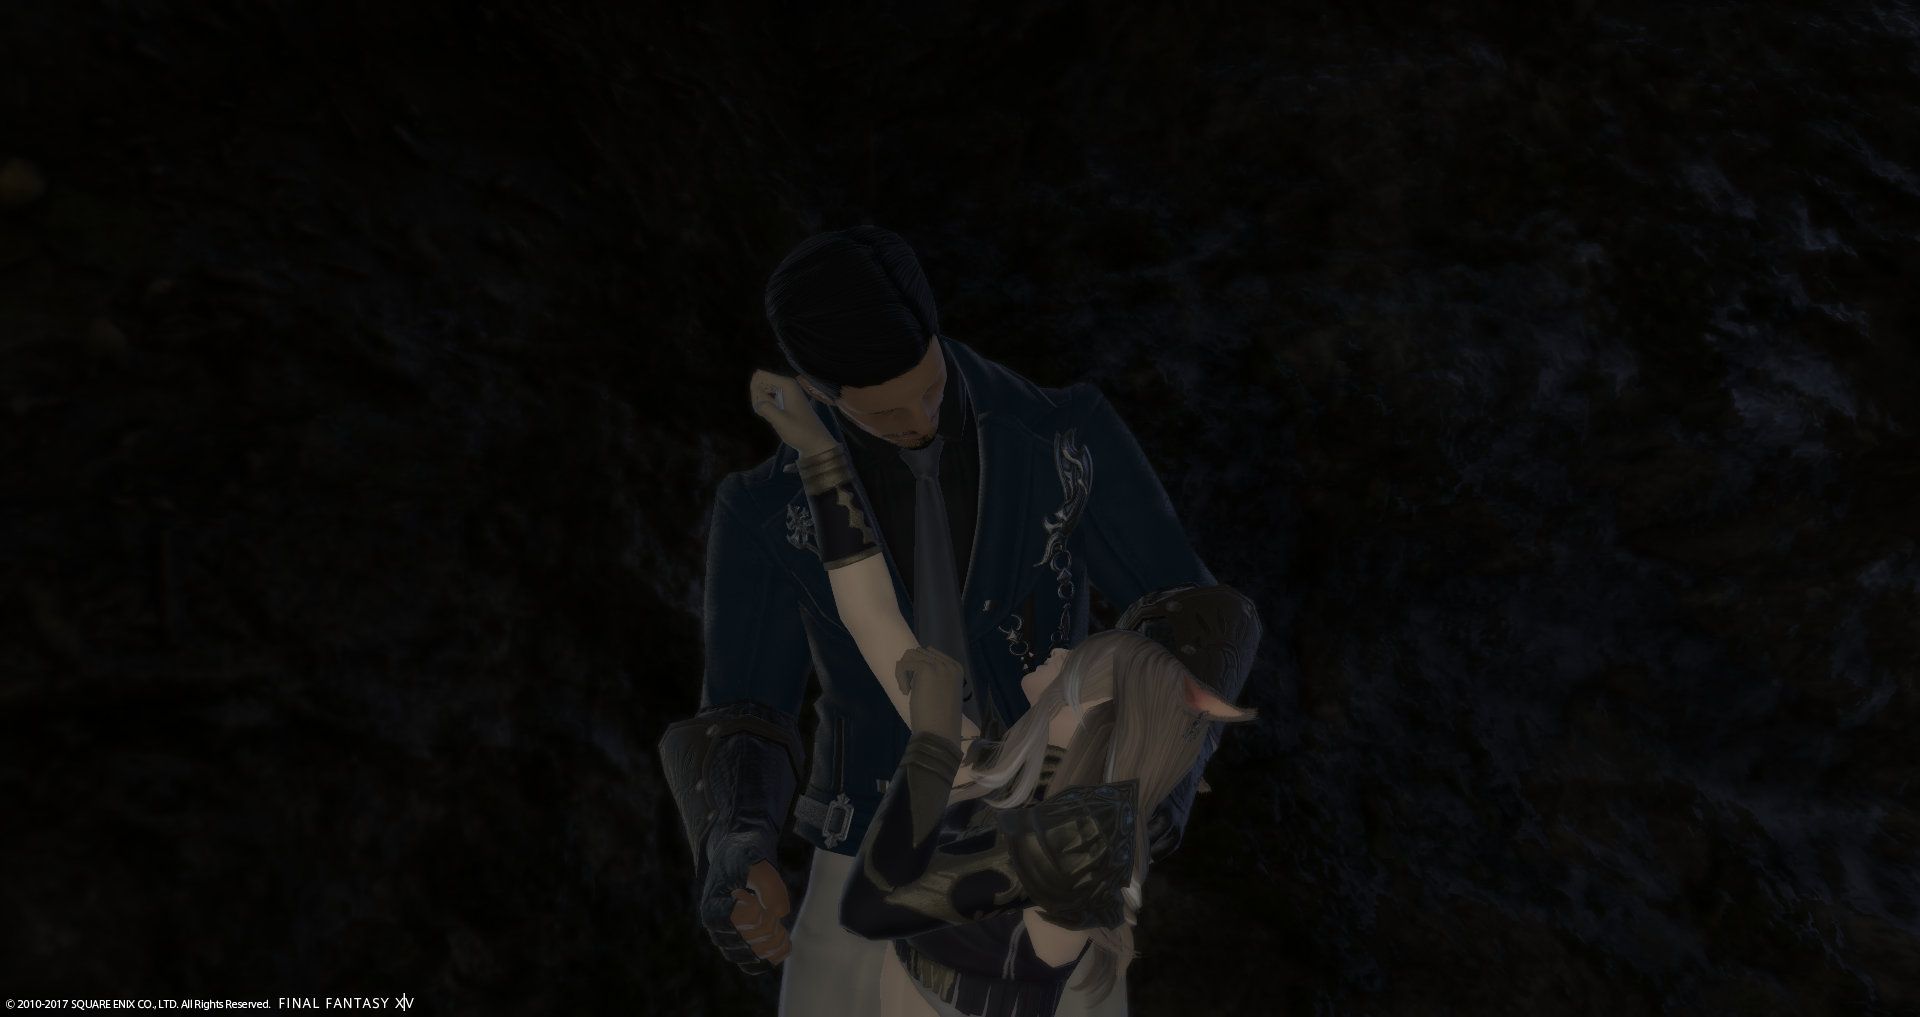 Here is an example of an image created before lighting has been added. I have arranged Novi and Ezekiel using the Individual Pause tool.[/caption]
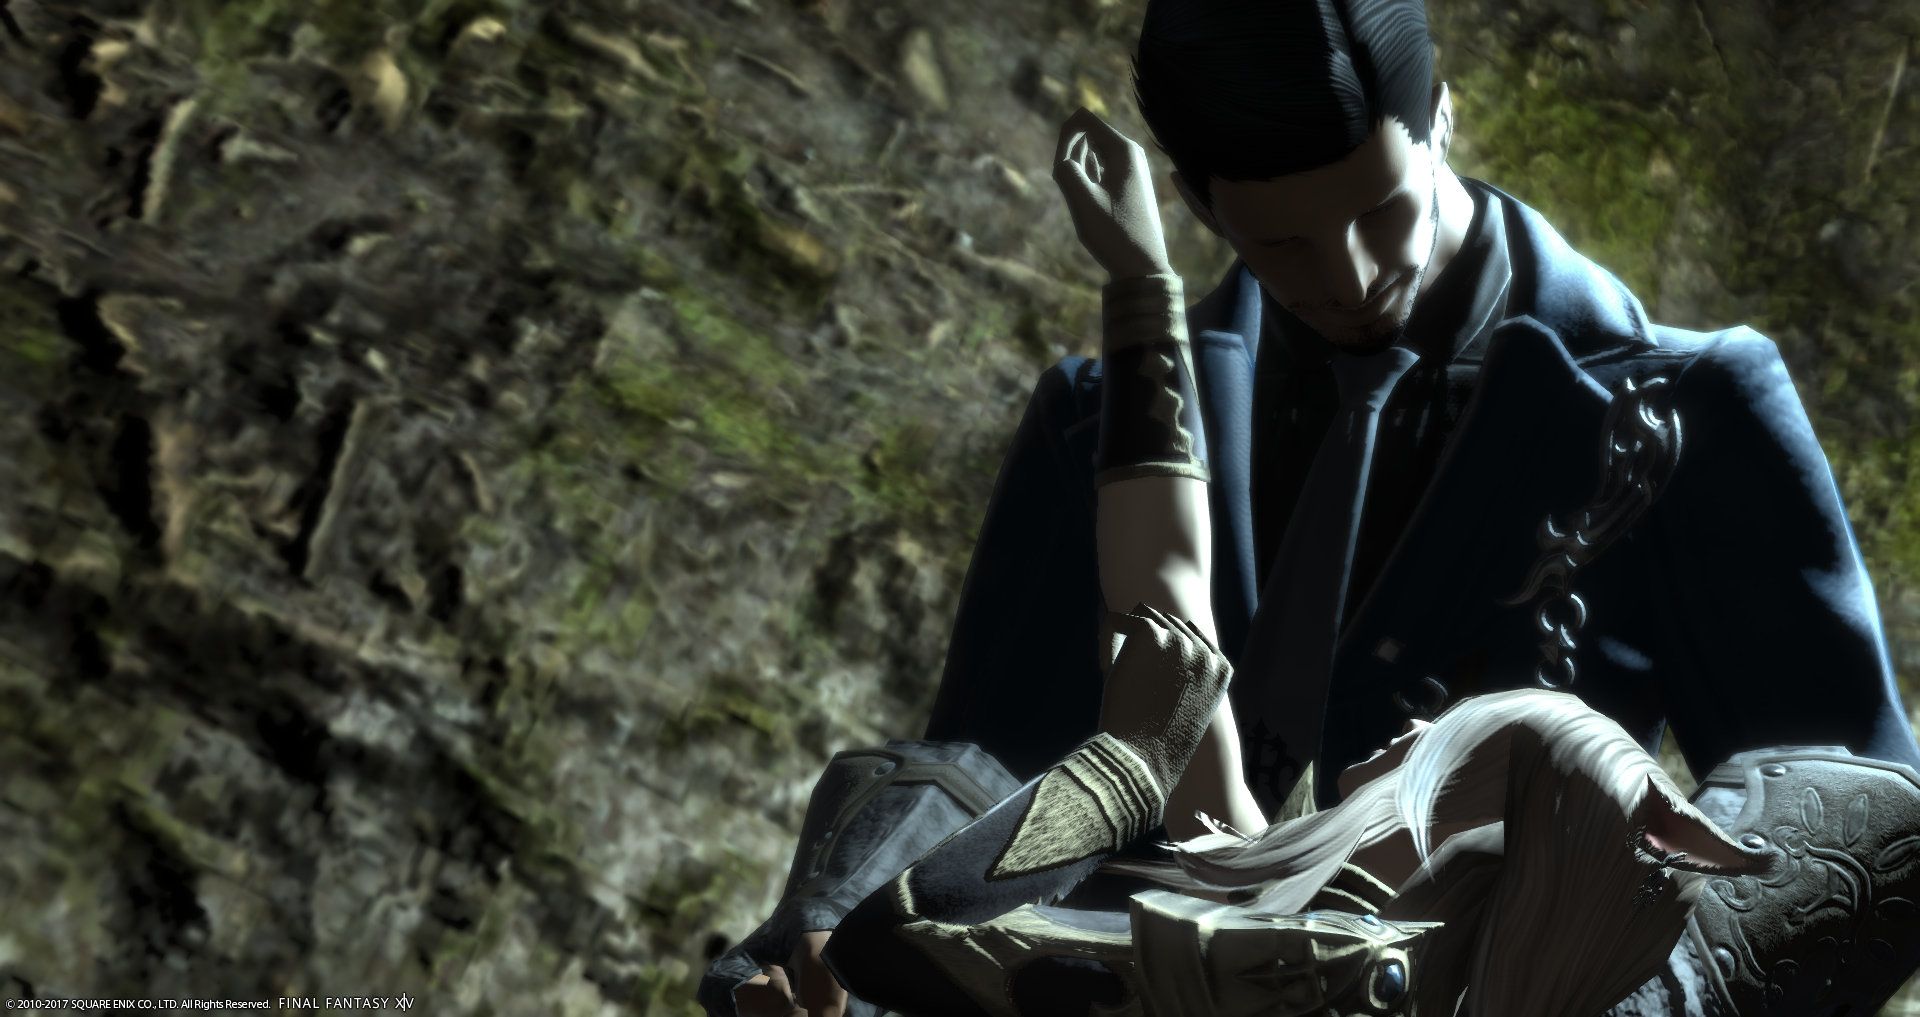
[caption id="attachment_77688" align="aligncenter" width="560"]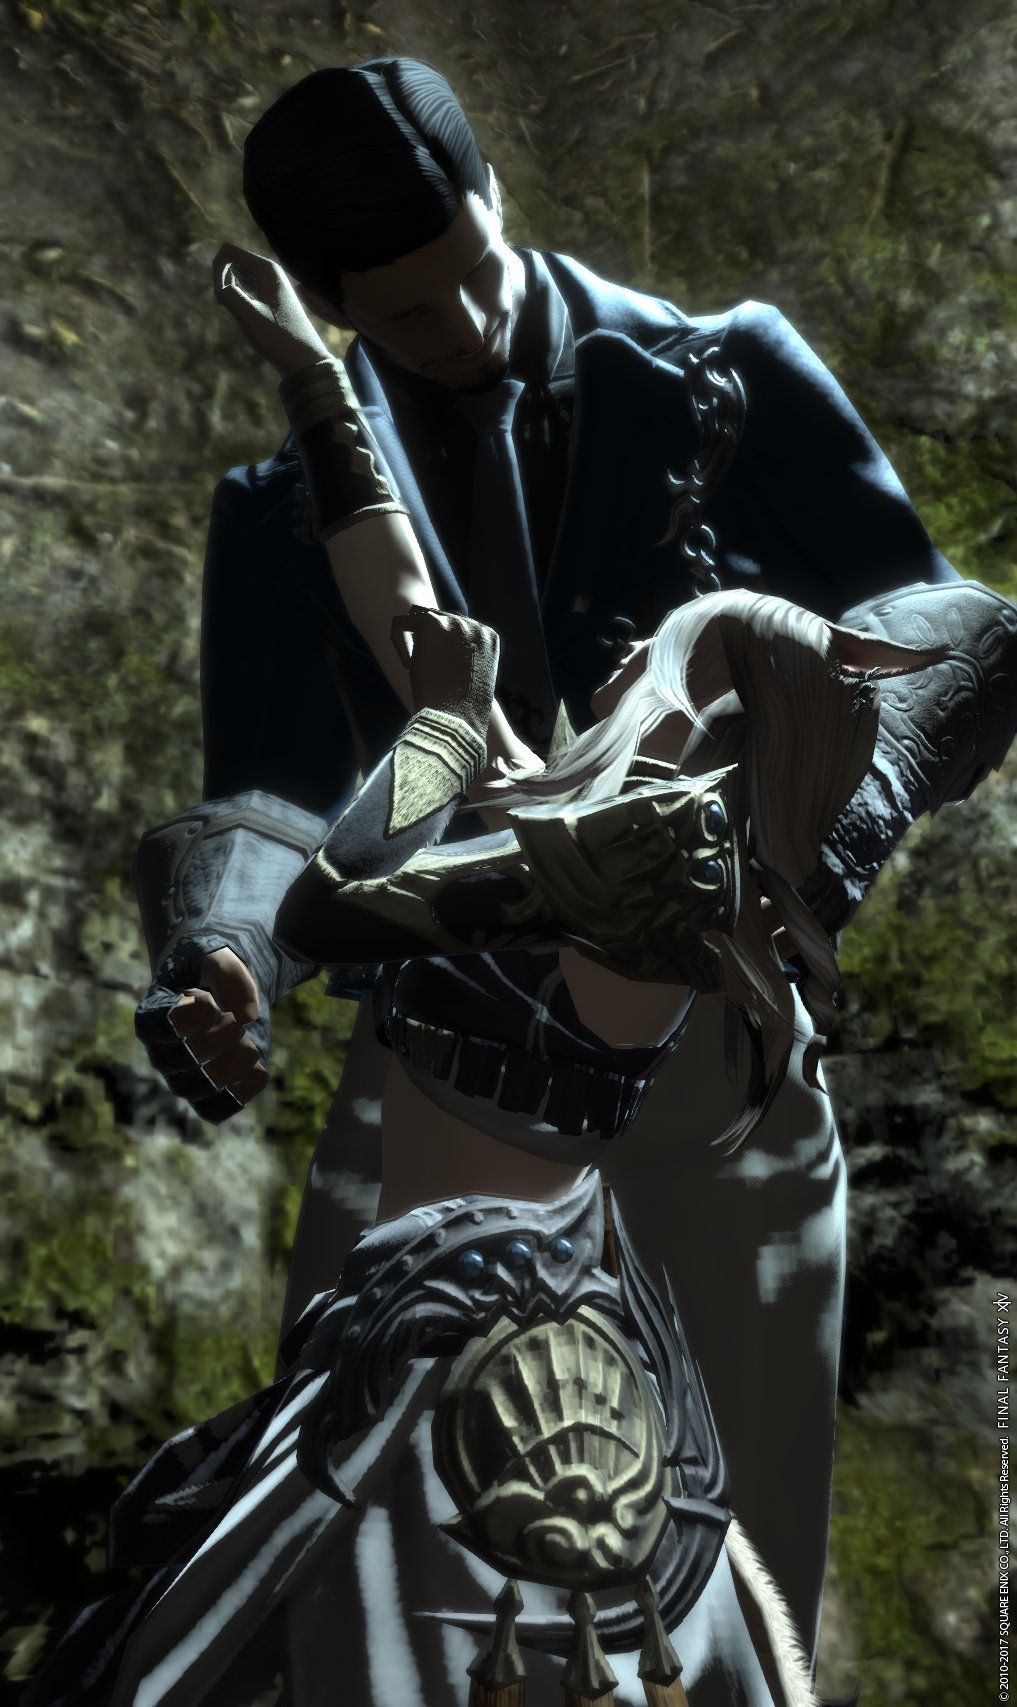 This is the difference lighting can make! To create the following image I've placed two light sources behind Ezekiel, diagonally to either side in their third (most intense) setting. To better frame the image, I've used the camera tilt functionality to change the image from landscape to portrait.[/caption]
Stormblood Group Pose Changes
On May 11th more information came to the Lodestone of future expansions to the Group Pose system that we will be able to enjoy when Stormblood arrives.
Additional Action Support: This is something many of us have been hoping for and will allow for a greater range of expressive movements. In the screenshot from the Lodestone we see this being displayed with the opening of a bottle of champagne but this will also work for *any* action used before entering the Group Pose tool. Other actions include limit breaks, mount actions, food, fireworks and battle actions.
Additional Color Filters: Bright 4, Pastel 3, Colored Marker 2, Monotone 1-3.
Additional Screen Effects: Frosted Glass, Polka Dot 2, Pencil 1-2, Particle, Sakura.
Additional Frame Patterns: Instant Camera, Ukiyo-e, Ornamental Borders 1-2, Wall Frame & Cinema.
[caption id="attachment_77696" align="aligncenter" width="560"]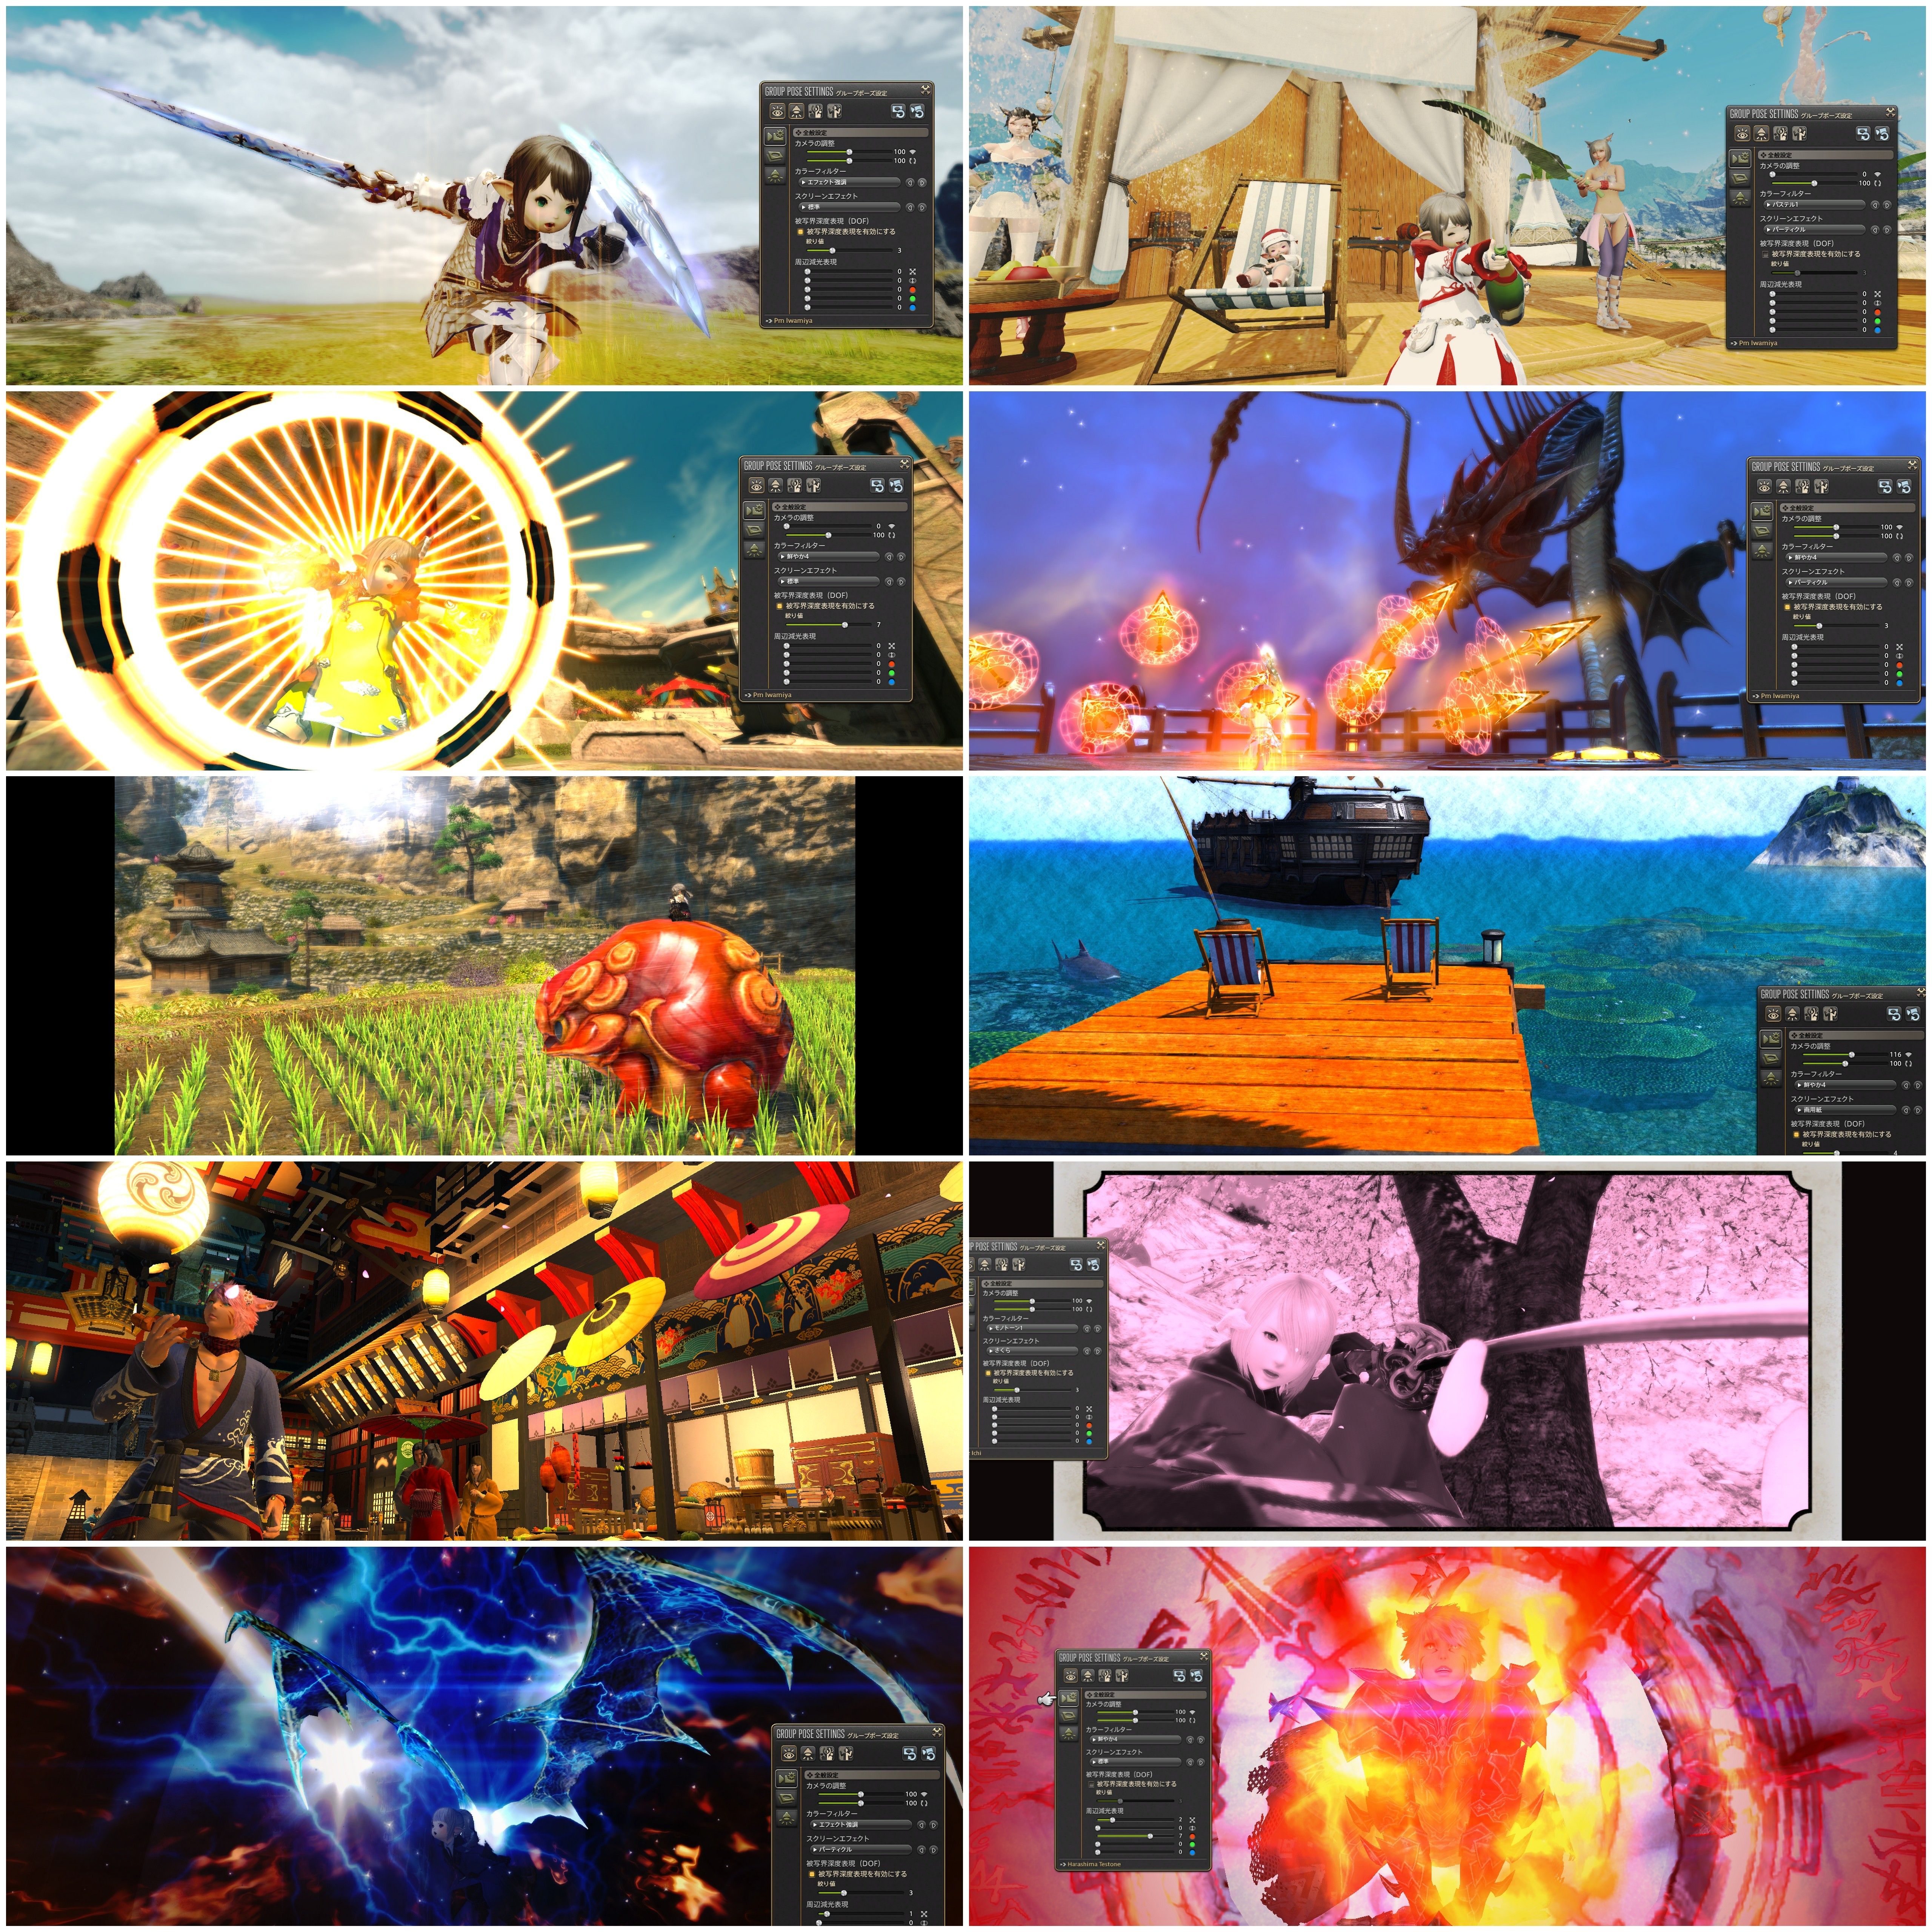 Click to enlarge. Image credit: Lodestone Developers' Blog[/caption]
More Group Pose Examples
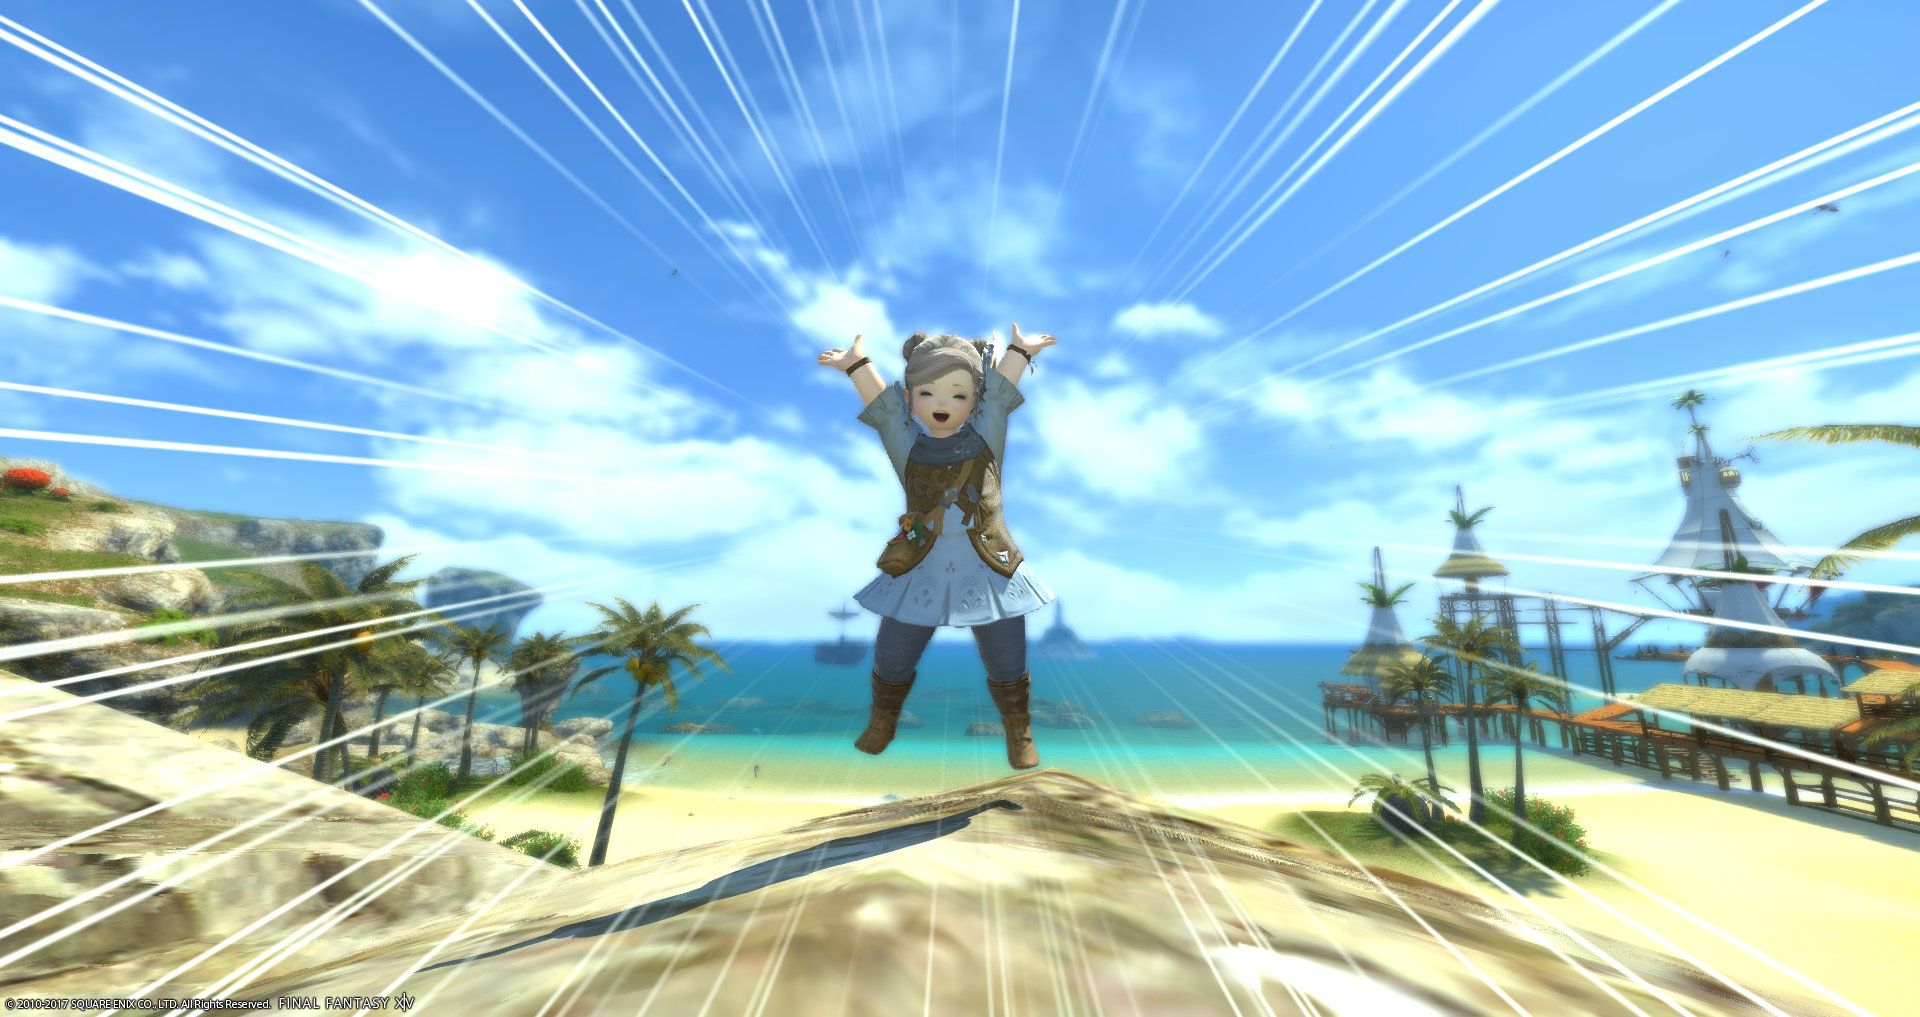
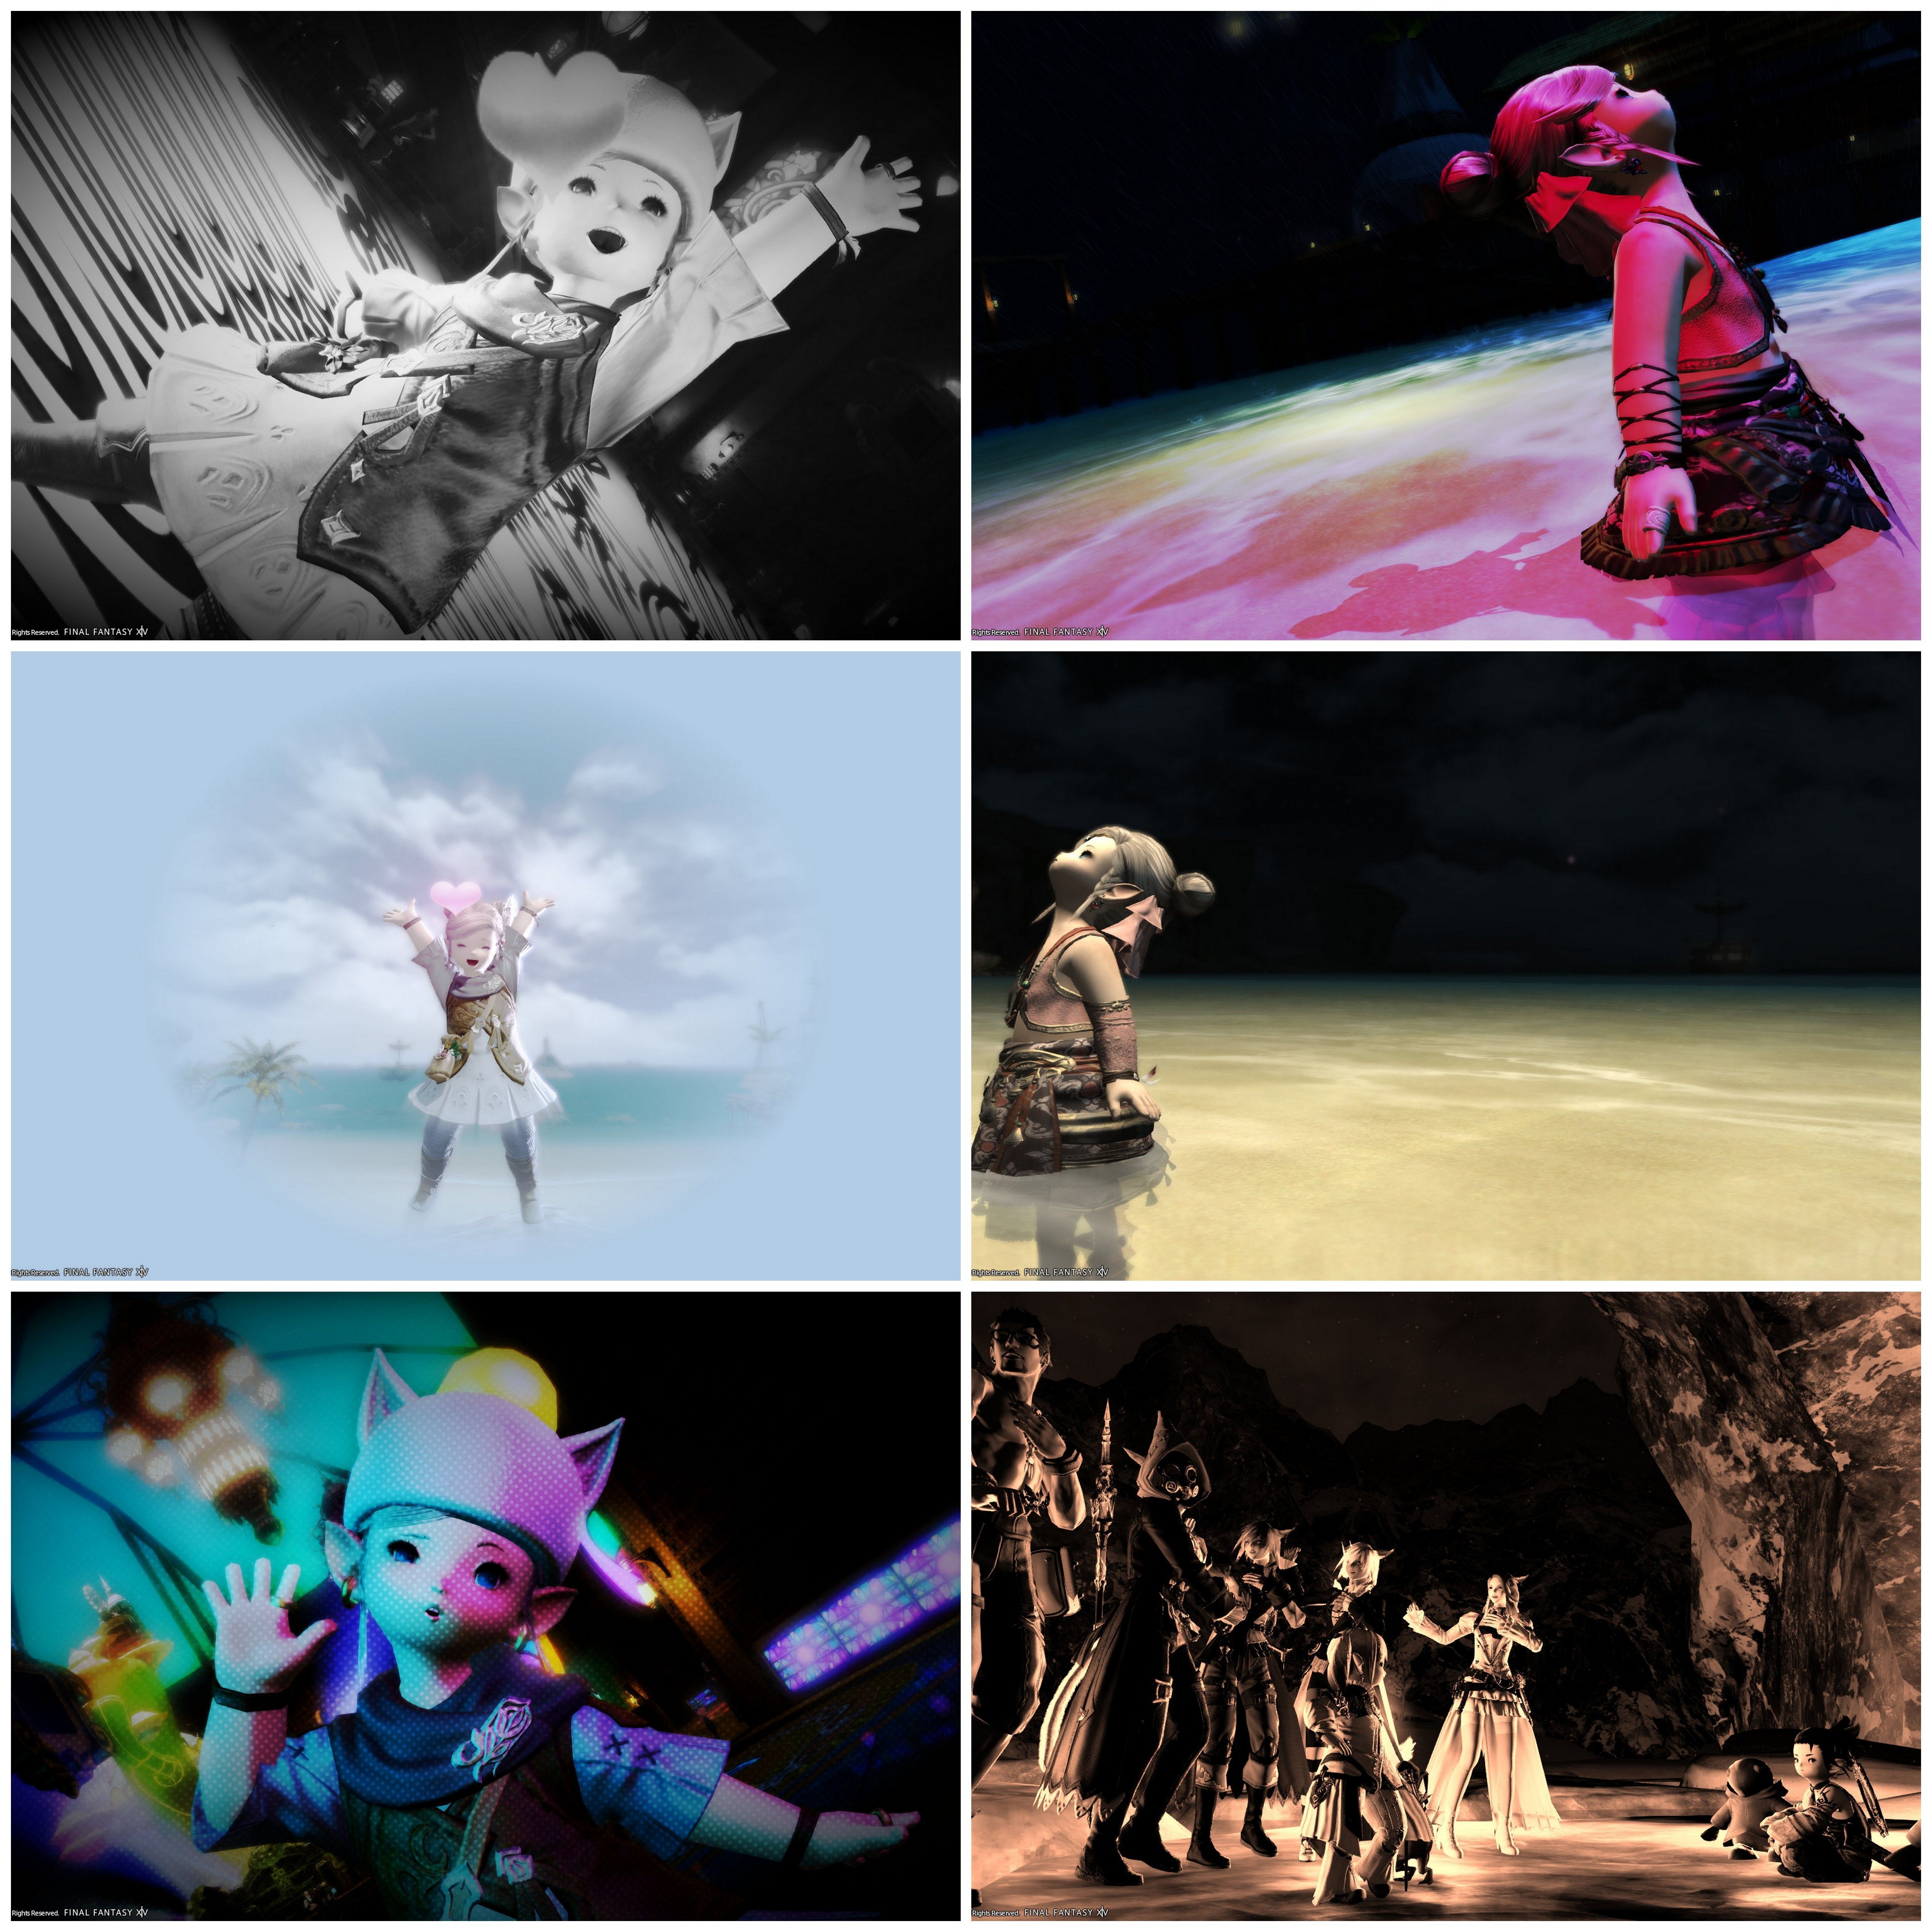
[caption id="attachment_77722" align="aligncenter" width="560"]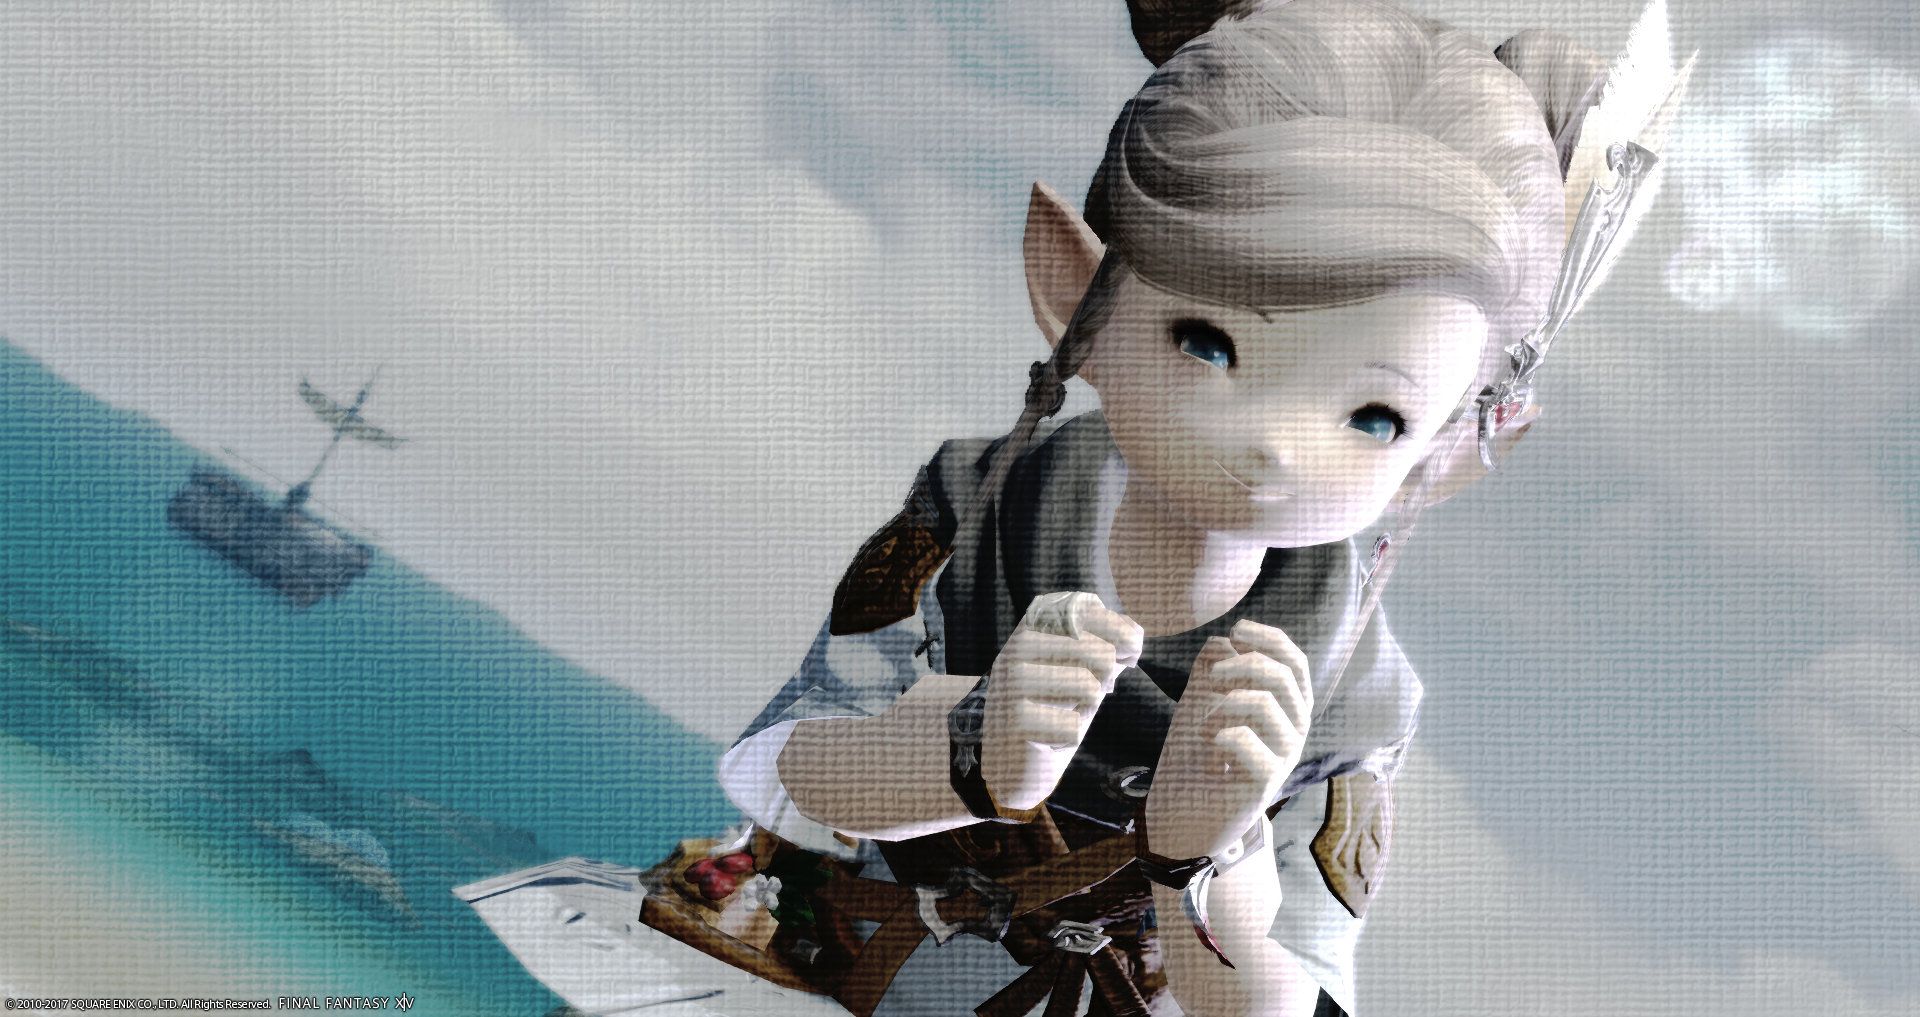 Emote: Happy - Zoom: 178 - Tilt: 83 - Color Filter: Pastel 2 - Screen Effect: Canvas - Limb Darkening: - DoF: Yes Lighting: 1 & 2 Type 3 - Status Effect: Sleep[/caption]
[caption id="attachment_77708" align="aligncenter" width="560"]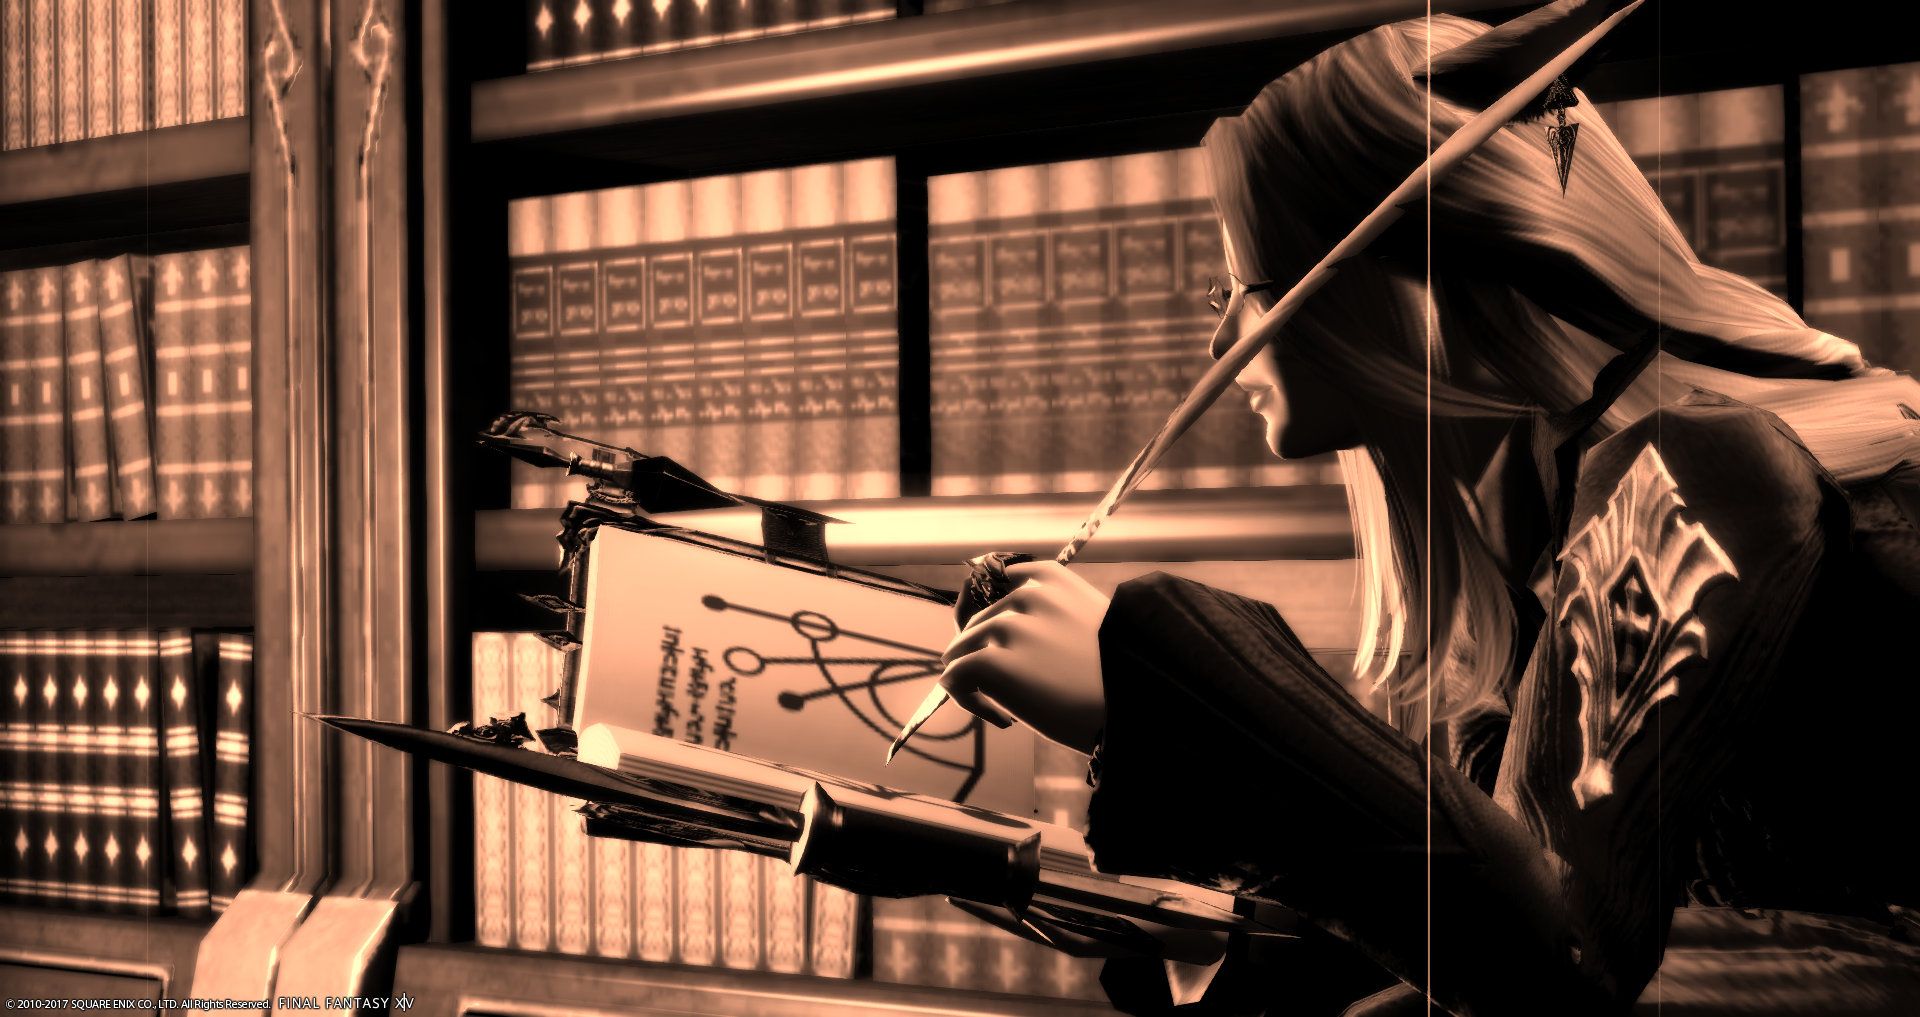 Emote: Battle Stance - Zoom: 180 - Tilt: 0 - Color Filter: Sepia 1 - Screen Effect: Noise 2 - Limb Darkening: None - DoF: Yes - Lighting: 1 & 2 Type 2 - Status Effect: None[/caption]
[caption id="attachment_77704" align="aligncenter" width="560"]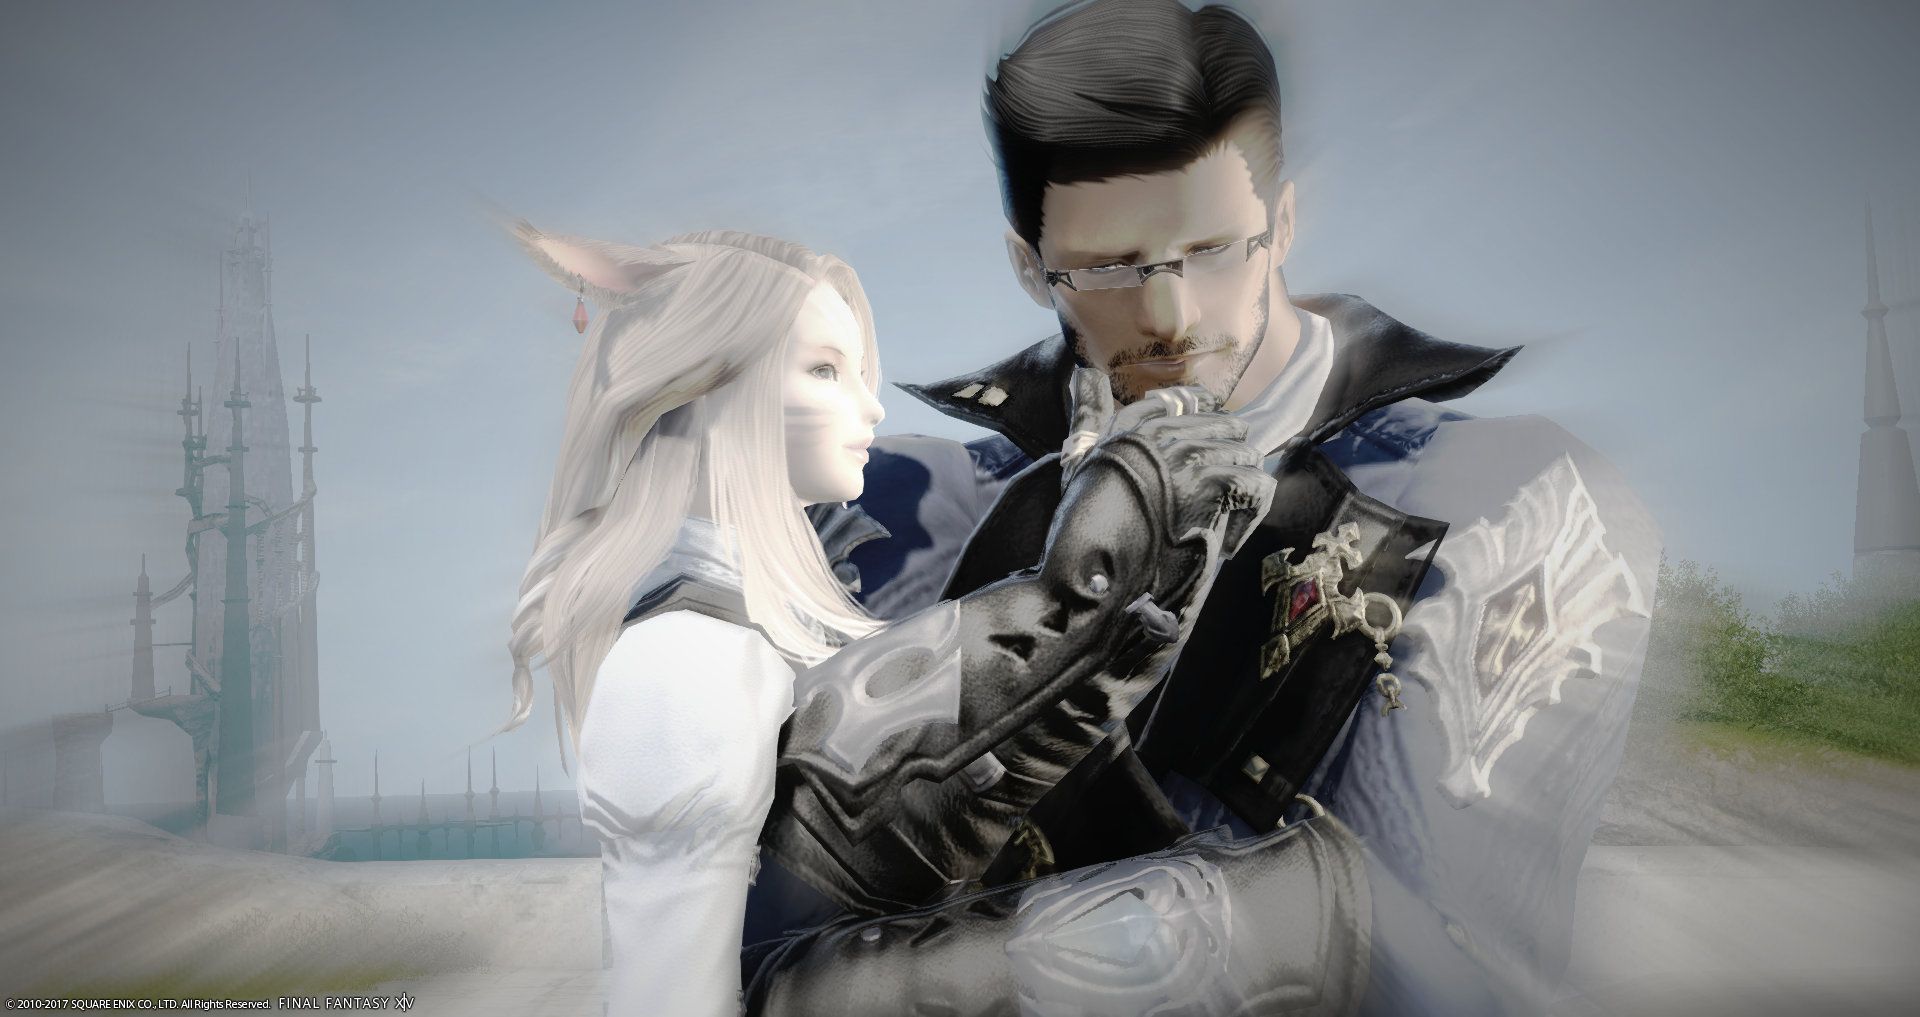 Emote: Think/smile - Zoom: 153 - Tilt: 100 - Color Filter: Pastel 2 - Screen Effect: Reflection Blur - Limb Darkening: None - DoF: Yes - Lighting: 1 & 2 Type 2 - Status Effect: None[/caption]
[caption id="attachment_77715" align="aligncenter" width="560"]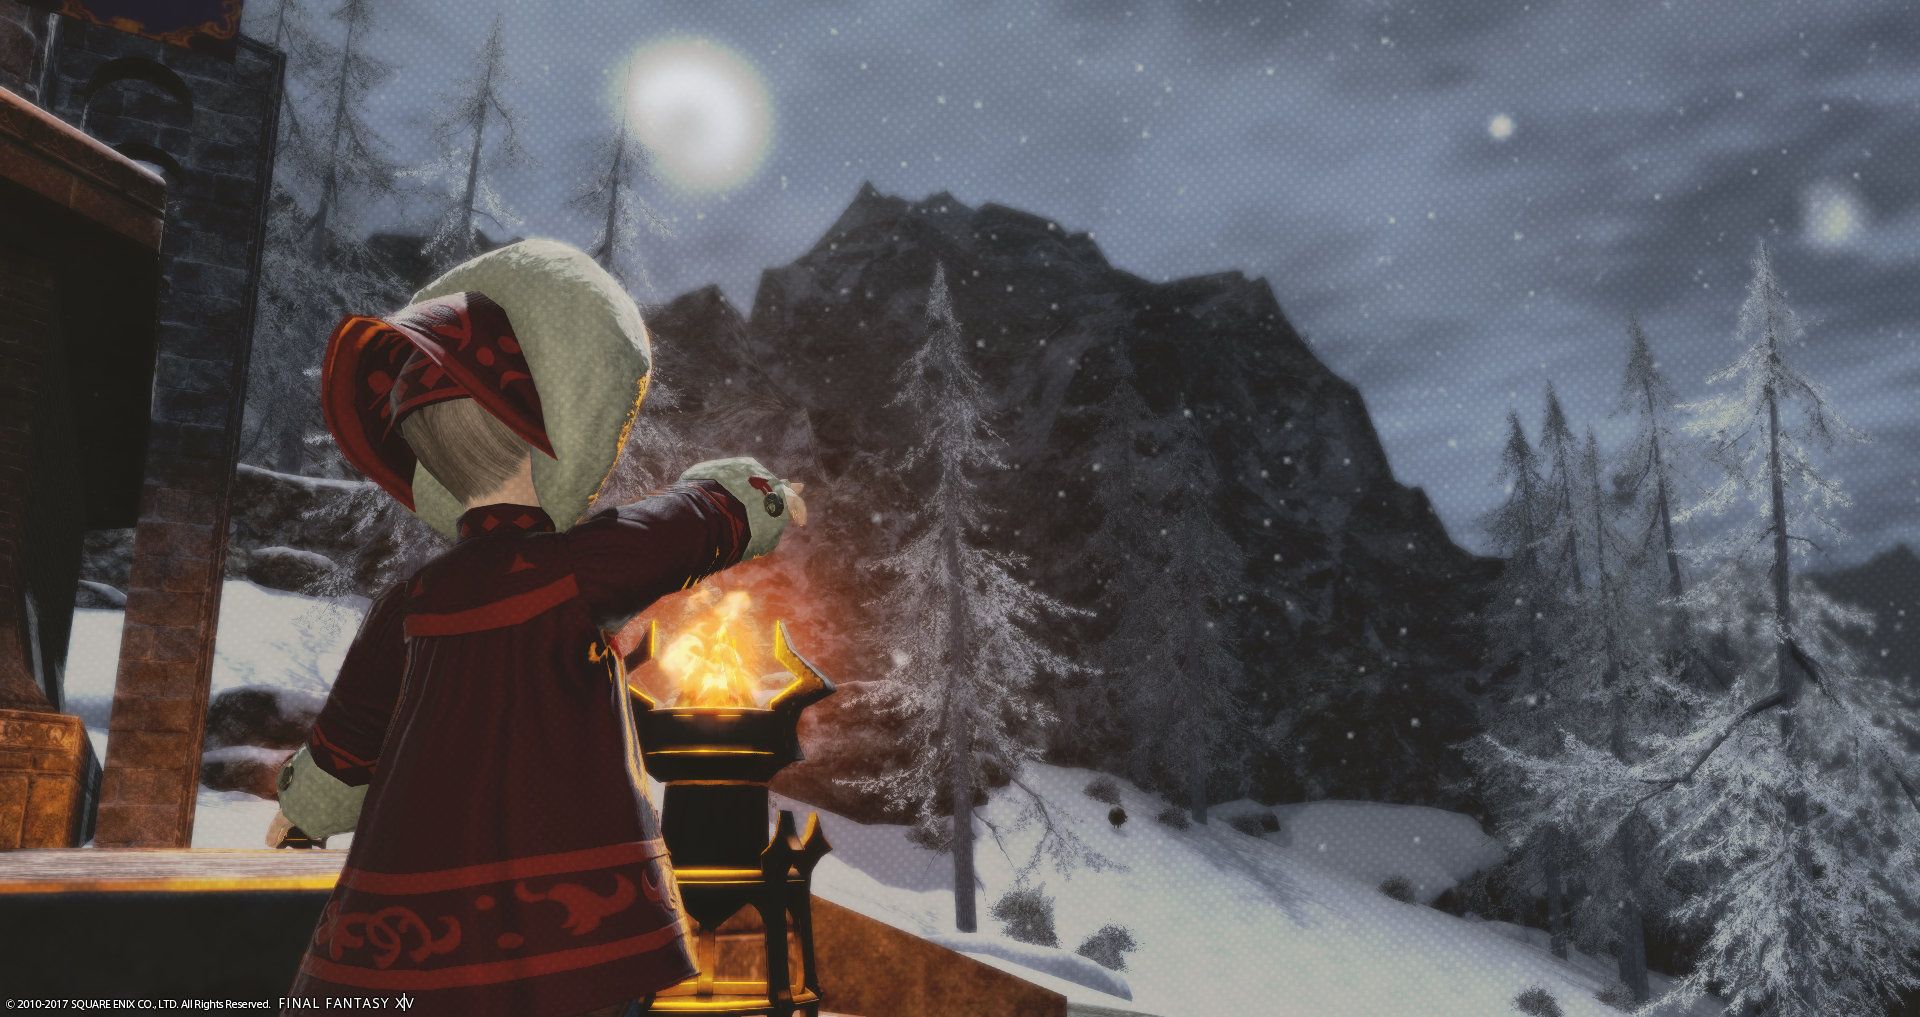 Emote: Point - Zoom: 114 - Tilt: 100 - Color Filter: Pastel 1 - Screen Effect: Polka Dots - Limb Darkening: None - DoF: Yes - Lighting: None - Status Effect: None[/caption]
[caption id="attachment_77717" align="aligncenter" width="560"] Emote: Battle Stance - Zoom: 149 - Tilt: 91 - Color Filter: Pastel 1 - Screen Effect: Polka Dots - Limb Darkening: 3 Pink - DoF: Yes 10 - Lighting: 1 Type 3 - Status Effect: Seduced[/caption]
[caption id="attachment_77735" align="aligncenter" width="560"]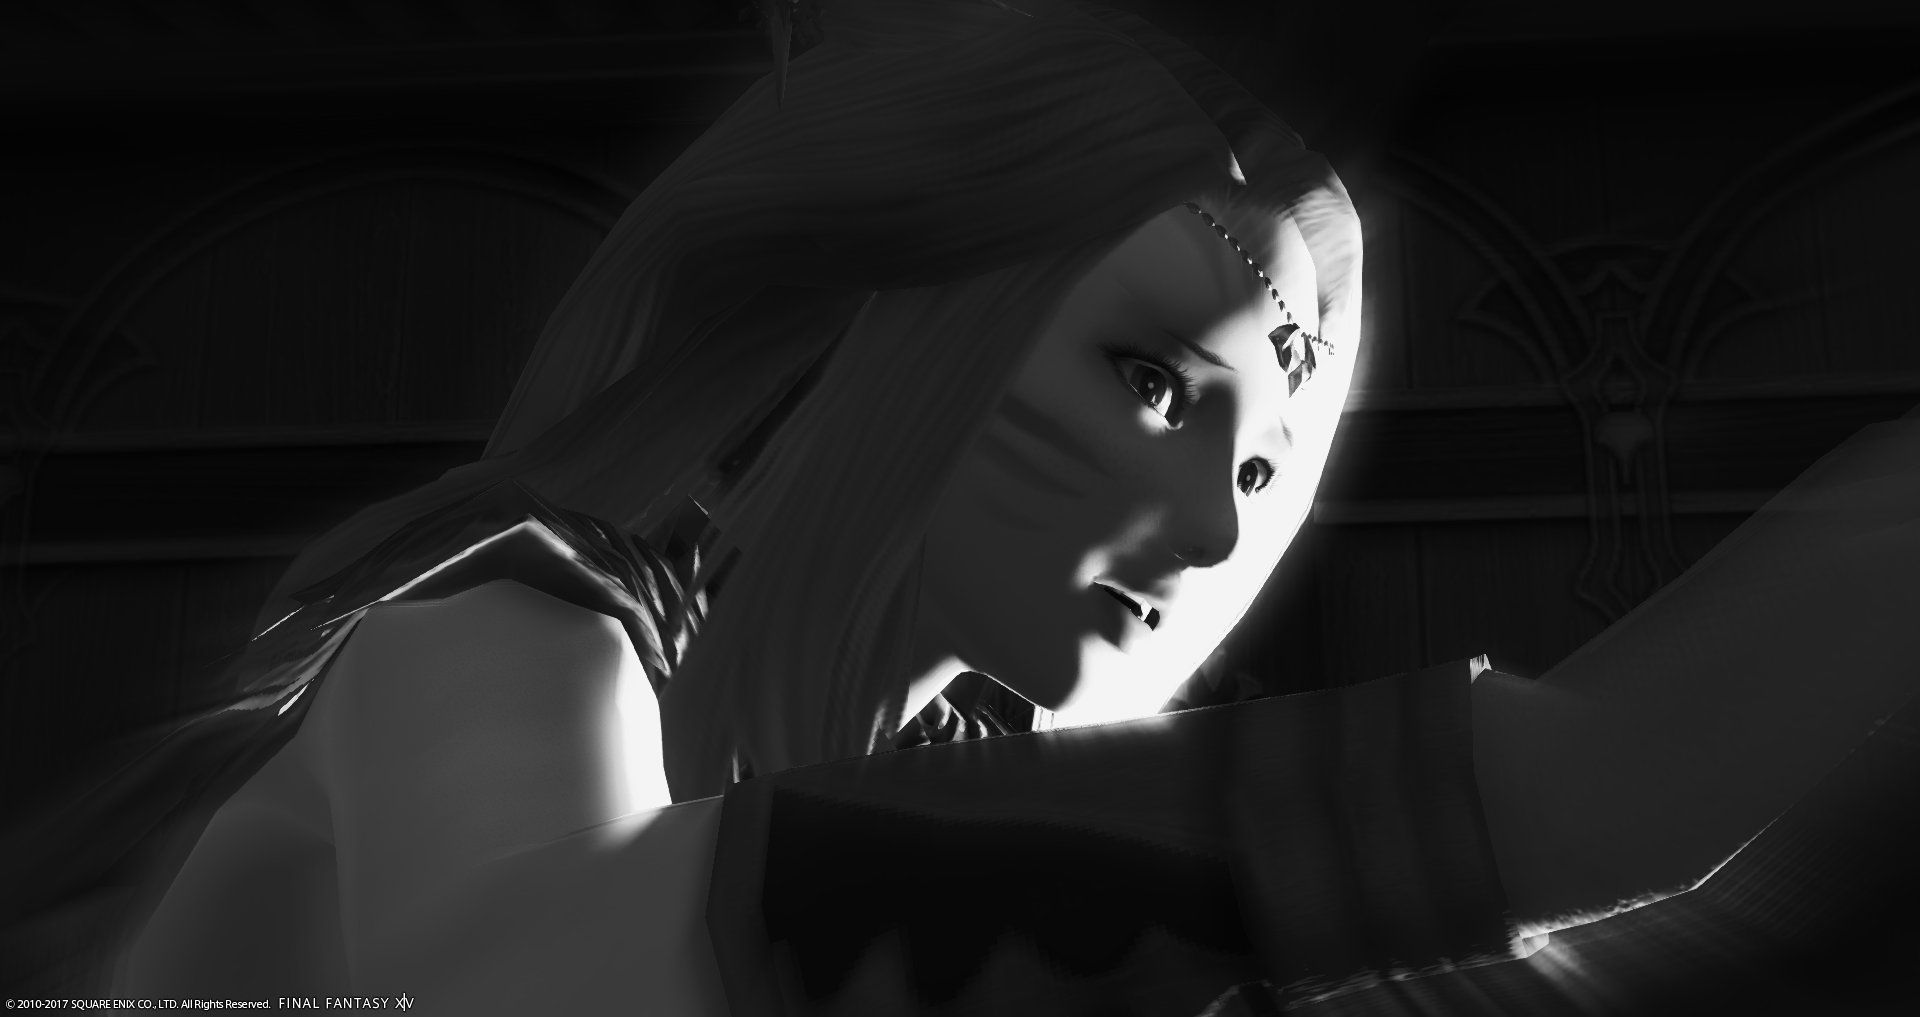 Emote: Disappointment & sad expression - Zoom: 189 - Tilt: 113 - Color Filter: Monochrome 2 - Screen Effect: Reflection Blur - Limb Darkening: None - DoF: Yes - Lighting: 1 & 2 Type 1 - Status Effect: Petrification [/caption]
[caption id="attachment_77707" align="aligncenter" width="560"]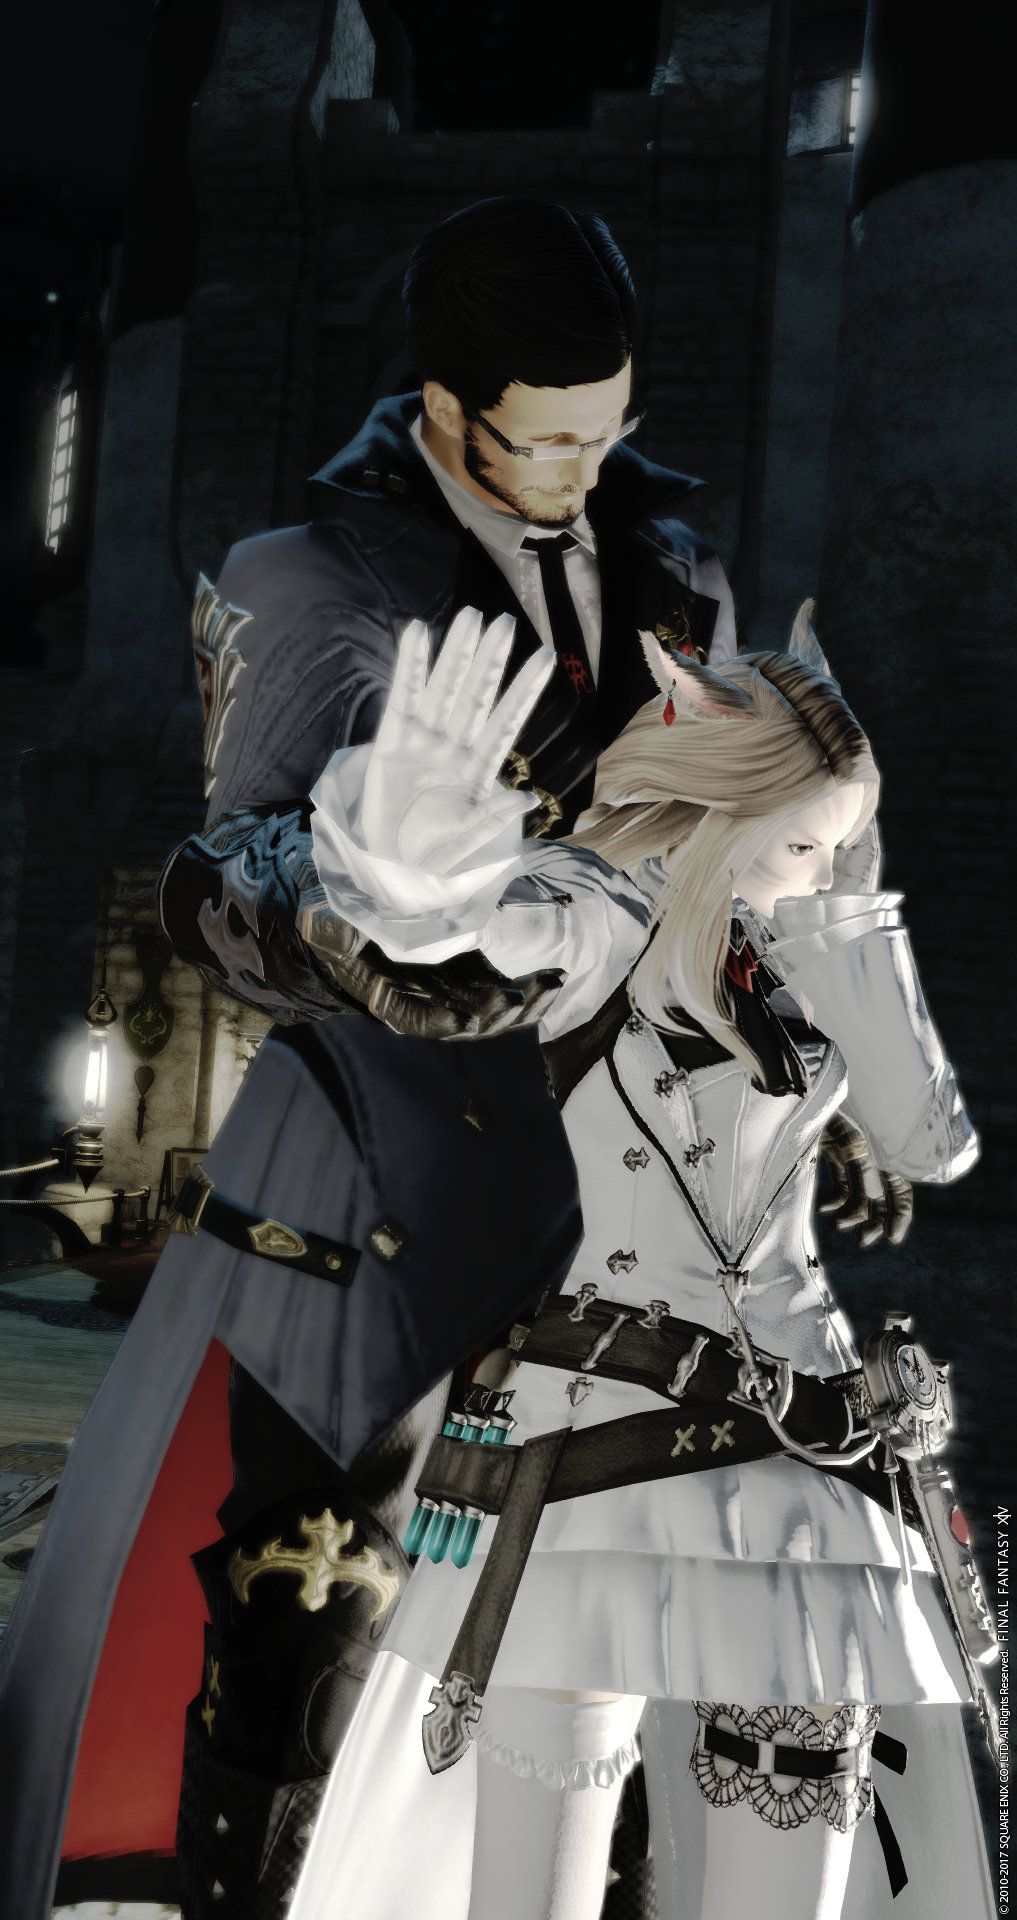 Zoom: 126 - Tilt: 52 - Color Filter: Pastel 2 - Screen Effect: None - Limb Darkening: 1-7 Black - DoF: Yes - Lighting: 1 Type 2 - Status Effect: None[/caption]
[caption id="attachment_77712" align="aligncenter" width="560"]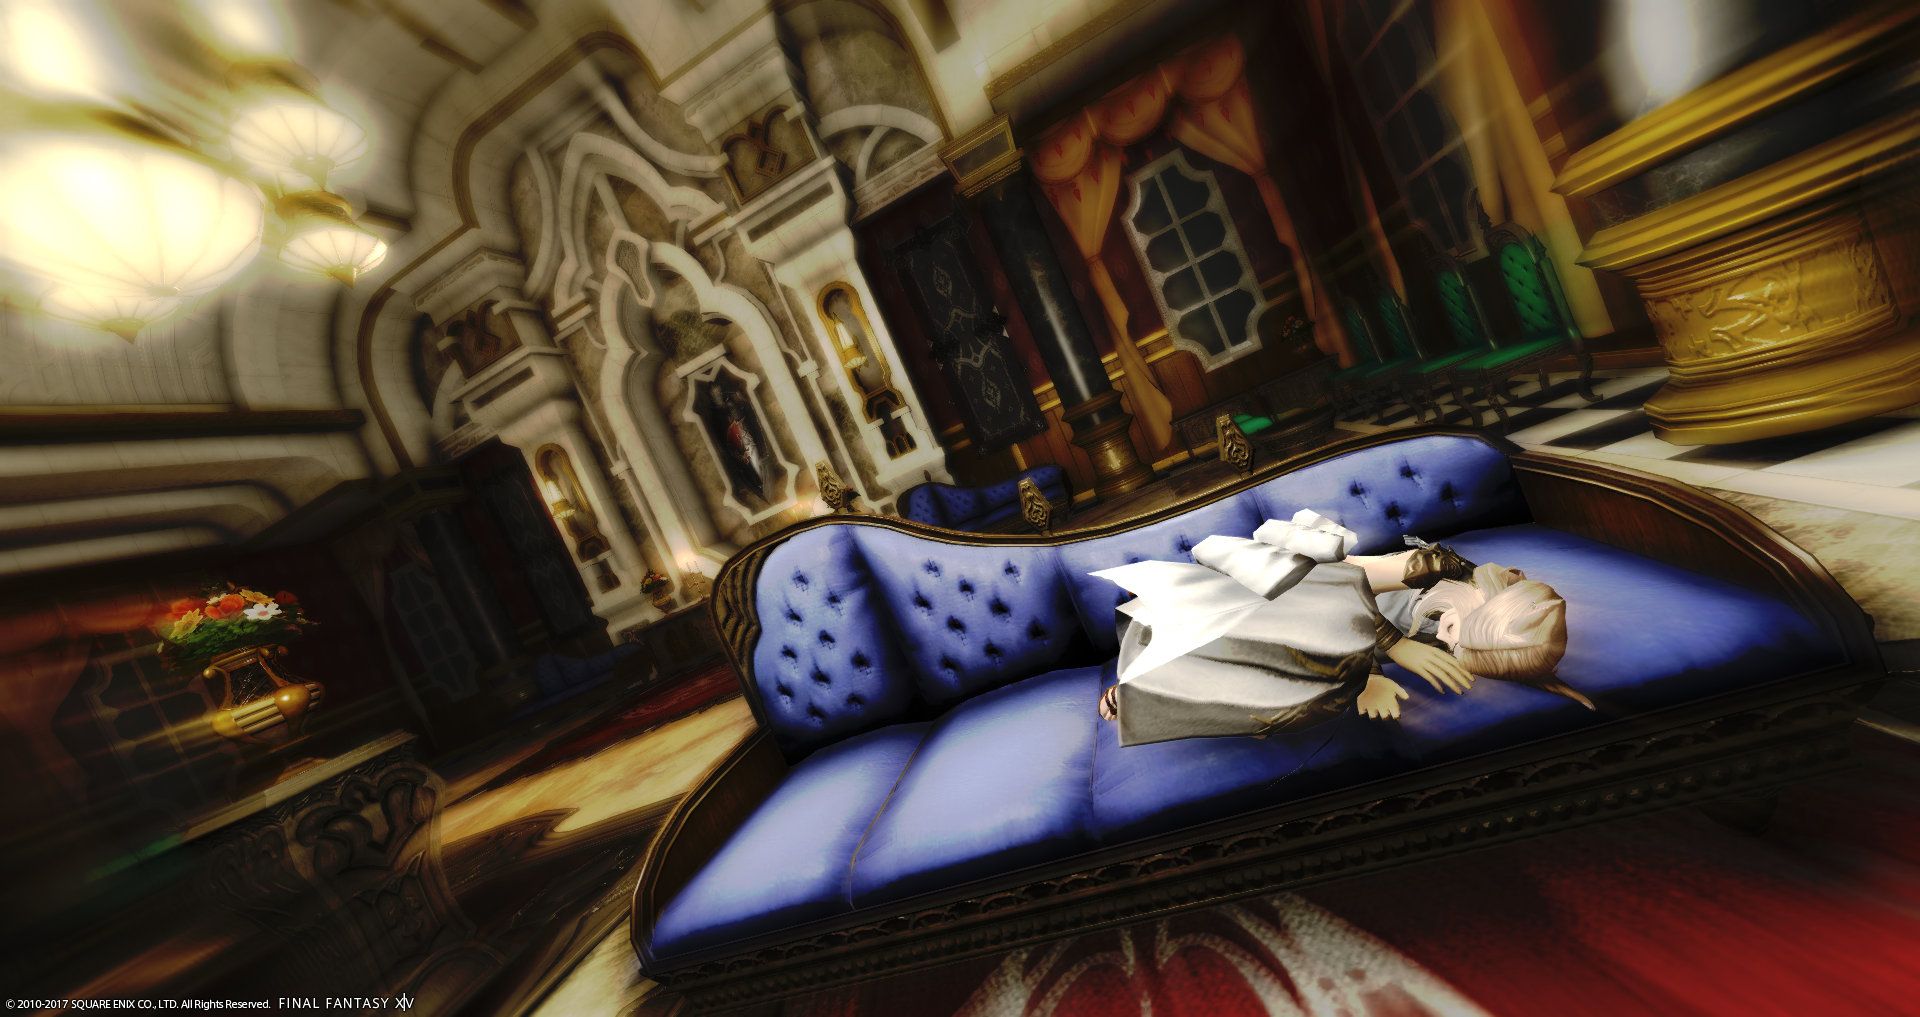 Zoom: 01 - Tilt: 113 - Color Filter: Strengthened Effects - Screen Effect: Reflection Blur - Limb Darkening: None - DoF: Yes - Lighting: 1 & 2 Type 1 & 2 - Status Effect: None[/caption]
General Advice
- Choose your location and time of day. If you want to practice with a constant light source then finding an inside location would be best.
- Pick your emote and/or facial expression. The emote will loop within the tool.
- Arrange and pause the emotes within the GPose tool.
- Set your desired lighting.
- Scroll through Color Filters/Screen Effects to see how these alter the image/lighting.
- Readjust the lighting to enhance the filters if required.
- Pan, tilt or zoom to frame your image. Don't forget to check how the image looks from both a close up and a distant perspective.
- Press the screenshot button!
Note: If you have trouble equalizing tones for higher contrast monochrome images, you could use the petrification Status Effect on the player with the light skin to darken the tone.
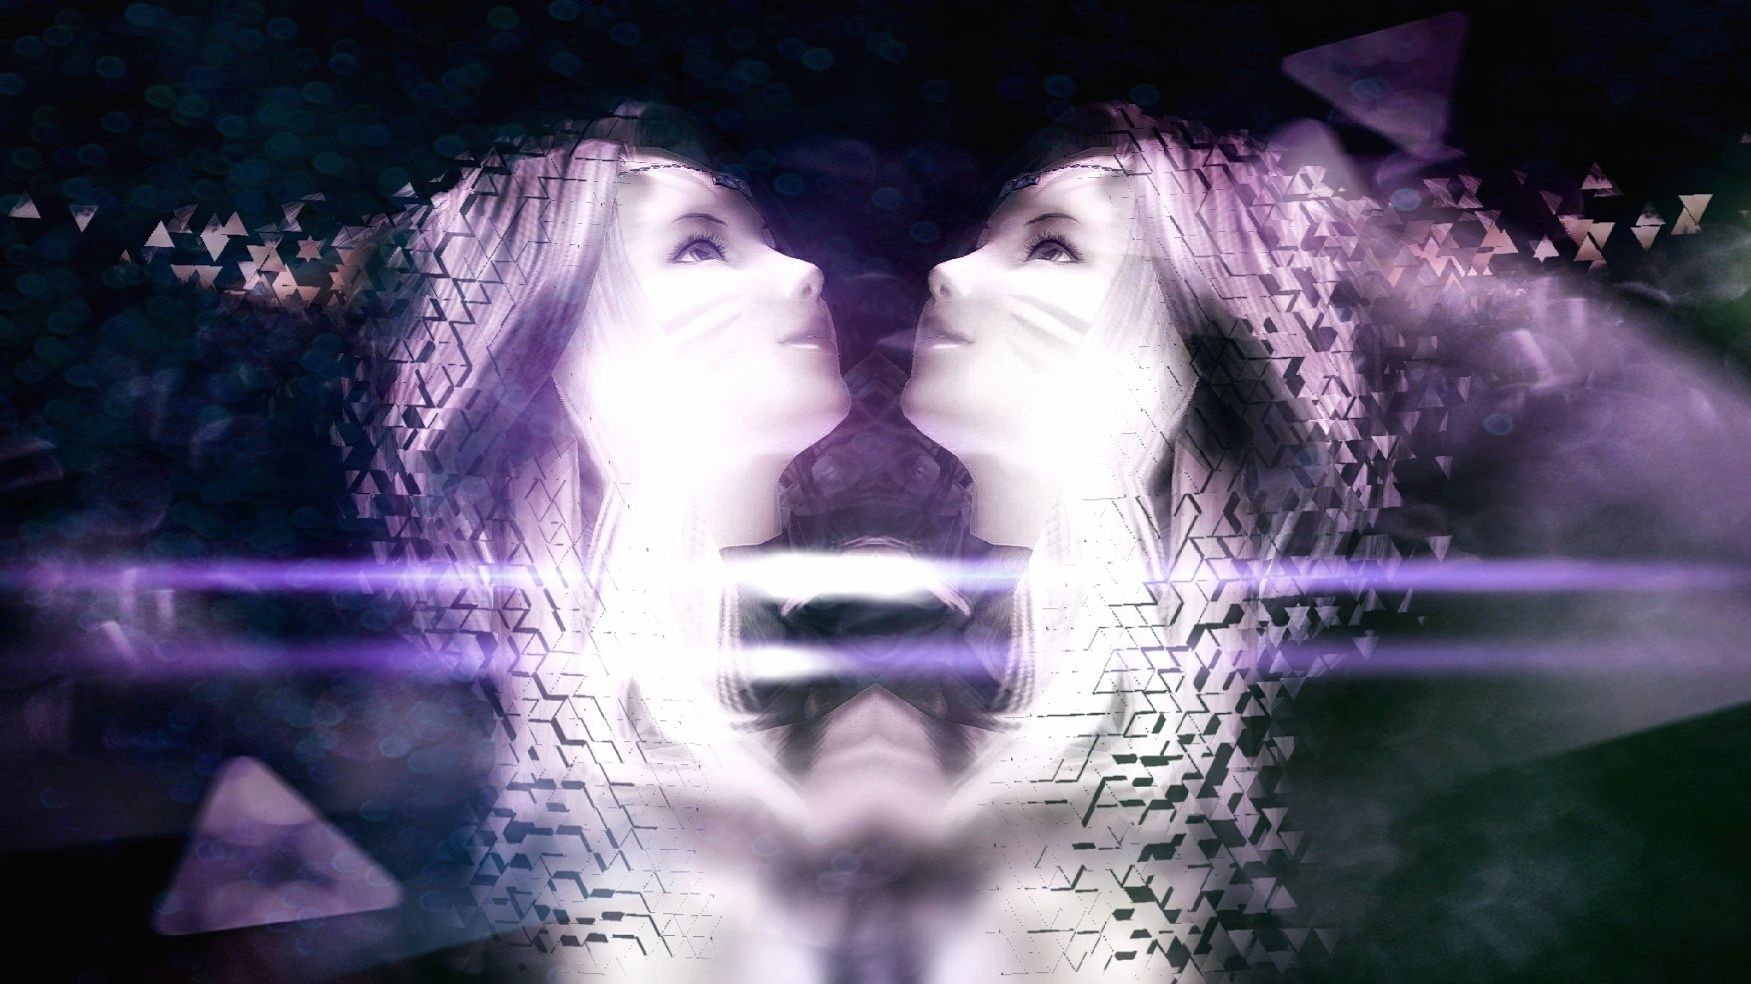
For more images from this collection click here. I'd like to say a very big thank you to Ezekiel for being a wonderful model and for giving me so much his time, allowing me to get some of these shots! I hope that in writing this article, you will be able to see the true potential the Group Pose tool has. In the next article in this series we'll be looking at how to create images like the one below. Until this time, I wish you happy travels across Eorzea with your camera in hand. I'd love to see your creations so don't forget to tag me through Twitter ! I'm really looking forward to more exciting developments within the GPose and really hope that future additions might include some additions that we are seeing in mobile apps. This might be a long shot but I'd also love to see an option to enter dungeons in 'photography mode' so that we can spend a limited time in some instances. This would really allow us to appreciate the level of detail and design contained within these environments, such as Library or The Vault.
If you have any queries or comments, please drop me a message in the section below.
