In today’s issue of Echoes of Eorzea, I will be walking through the ReShade Install Guide and show you how to go about creating some screenshots with various different effects over the top.

My intention with this article is to show you that this tool exists, what it does and how to use it. In other words, I found a tool that has made my screenshots look shinier and I’d like to share what I have learned with you. Following several earlier failed attempts to get this tool working, I decided to try to create a concise guide. I have also included a video to provide more of a visual guide for the install process. Please check the disclaimers at the bottom of this article before you attempt to install ReShade.
This guide is updated as of version 3.1, although the principles of install remain the same from earlier versions.
What is Reshade?
ReShade is an advanced, fully generic post-processing injector for games and video software developed by crosire. Imagine your favorite game with ambient occlusion, real depth of field effects, color correction and more … ReShade exposes an automated and generic way to access both frame color and depth information (latter is automatically disabled during multiplayer to prevent exploitation) and all the tools to make it happen.
In other words, it’s a live post-processing program that will enhance a game’s graphical output by means of an overlay with adjustable parameters.
The guide will cover topics in this order: Introduction, Video Guide, Quick Guide, Full Installation Guide, Basic Image Guide, Updating ReShade, Disclaimers, Bugs & FAQ's and finally Preset Downloads.
Note: Any install is at your own risk, but please, remember to backup before you do anything!
Reshade Install Video Guide
 Important Information
Reshade Download Link
FFXIV Preset Library Link
Folders you will need:
For Steam: C:\Program Files (x86)\Steam\steamapps\common\FINAL FANTASY XIV – A Realm Reborn\game
For PC: C:\Program Files (x86)\SquareEnix\FINAL FANTASY XIV – A Realm Reborn\game
Note: Game folder, not Boot!
Note: “\Documents\my games\FINAL FANTASY XIV – A Realm Reborn” path is not relevant for ReShade.
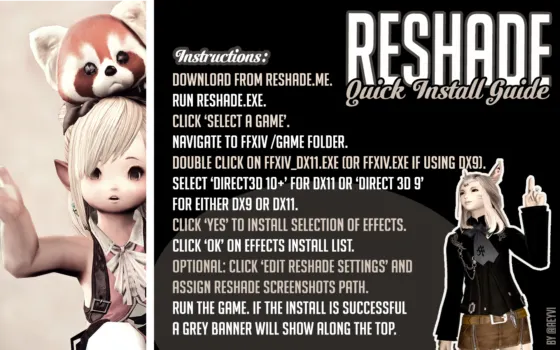
ReShade Install Quick Guide
Full ReShade Installation
Step 1 - Introduction
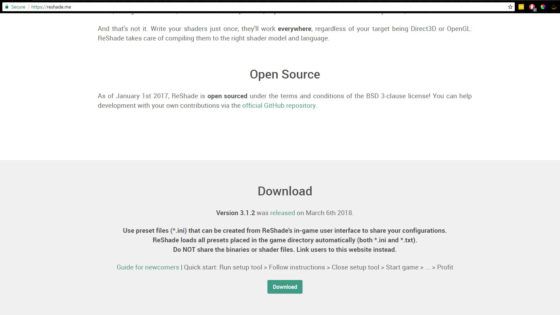
Go to http://www.reshade.me and download the current version of ReShade.
After ReShade is downloaded, move the setup file from your download folder if you want to keep it somewhere more convenient (for the video it has been moved to the desktop).
Step 2 - Preparation
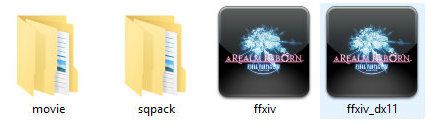
Go to the folder ‘\FINAL FANTASY XIV - A Realm Reborn\game’ and take a screenshot of the folder in case you want to remove ReShade at a later time.
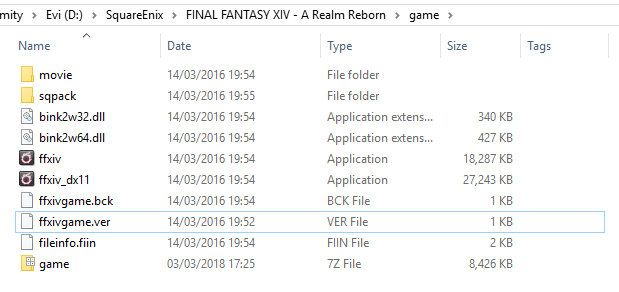 Screenshot of FFXIV folder prior to installing ReShade.
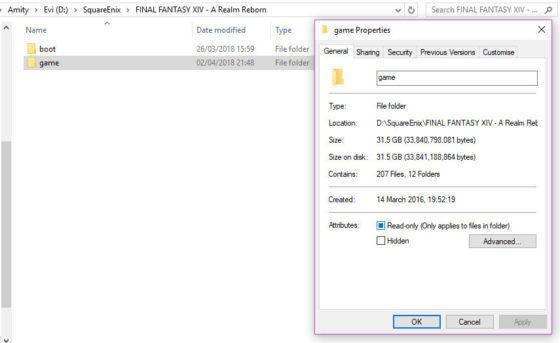
Go one folder up, right-click the \game folder and make sure the ‘Read-only’ box in the attribute section does not contain a tick (a black box marker in the ‘Read-only’ box is fine).
Go back to the \game folder and create and name a new folder for the ReShade screenshots to be stored in later (i.e. ReShadeScreenshots).
Step 3 - Installation
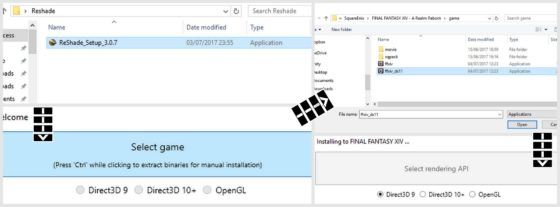
Double click the ReShade setup you downloaded earlier, click ‘Select game’ and navigate to the \game folder.
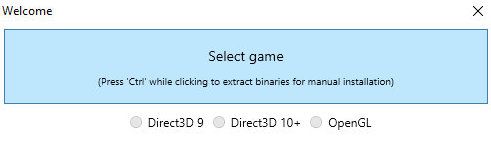
Select ‘ffxiv_dx11.exe’ for DX11 or ‘ffxiv.exe’ for DX9. You can check which DX you are using within the FFXIV launcher settings.
Then select ‘Direct3D 10+’ for DX11 or ‘Direct 3D 9’ for either DX9 or DX11.
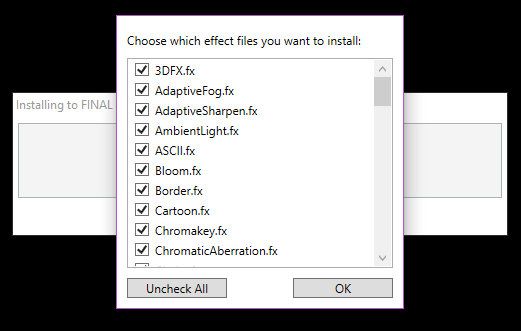
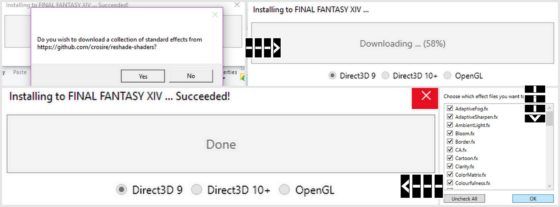
The setup will prompt you to download a collection of standard effects. Click Yes. When these are downloaded, a list of downloaded effects will show. Click OK.
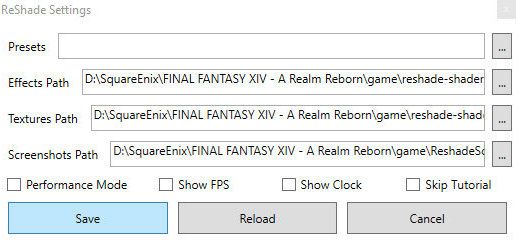
Click on ‘Edit ReShade settings’, and click the 3 dots next to ‘Screenshots Path’. Navigate to the screenshot folder you created in Step 2, point 3 and click ‘Select folder’. Click ‘Save’ at the bottom.
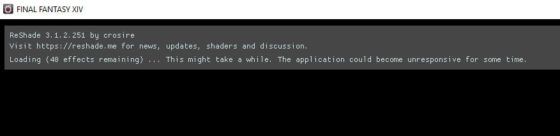
Launch the game through the launcher as normal. If ReShade was successfully installed, a grey bar showing ReShade information should display at the top of the FFXIV game window. It should load in all the previously downloaded effects.
The ReShade overlay menu can be toggled in-game with Shift + F2 by default.
Step 4 - Settings
When you first open the ReShade overlay in the game with Shift + F2, click on the ‘Settings’ tab. Here you can change the overlay hotkey, usage mode, input processing, screenshot storage format and more.
To enable mouse control across the screen, change ‘Block all input when overlay is visible’ to ‘Block input when cursor is on overlay’.
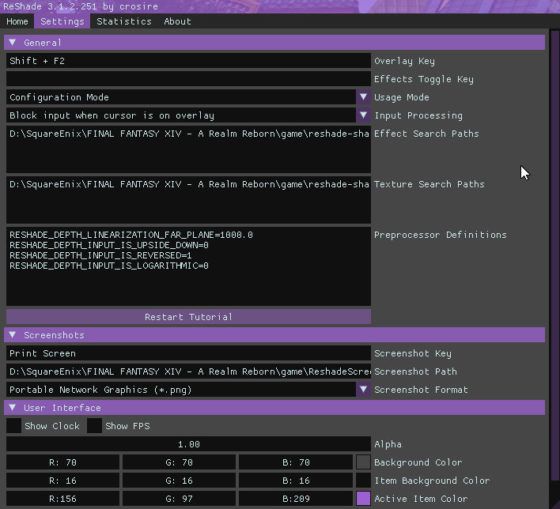
Optional: Change file type to .png.
Optional: Change the color scheme if you wish!
Step 5 - Presets
Click on the ‘Home’ tab at the top. A tutorial will display. Click the ‘+’ sign name and start setting up a new preset. Name this preset ‘Plain’.
A list of all the shaders/effects will show, and can be toggled on and off individually. More instructions will display, click Continue.
The advanced settings for each effect will now display at the bottom half. Click ‘Finish’ at the bottom, and ‘Collapse All’ near the top to make things more manageable.
To check that the effects are working properly, tick the box for an effect (i.e. Adaptive Sharpen). Out of game, navigate to your \game folder where your preset will have generated a file (plain.ini). Double click it to see all the active settings for this particular preset, which should now show a list of variables.
Back in the game, you can now keep adding or removing effects as you like. As this is a plain filter, toggle off all settings and create a new file.
[caption id="attachment_216652" align="aligncenter" width="560"]
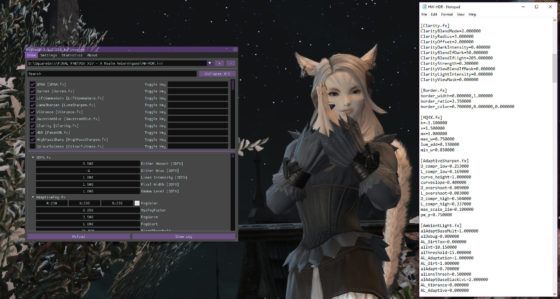 Example of what a .ini file structure should look like.[/caption]
Step 6 - Installing and downloading premade presets.
Click any preset, but make sure the preset you select has ReShade listed under the Shader header. The preset should say ‘Shader used: ReShade’ at the top of its page.
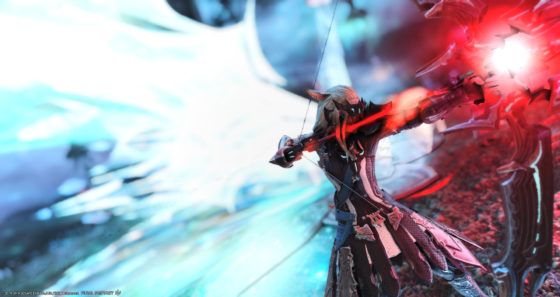
Example images will show the effects of this particular preset.
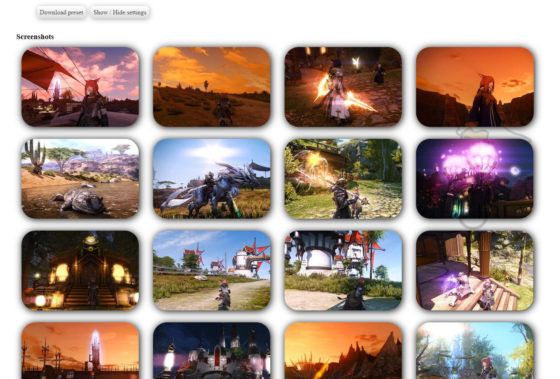
To download, click ‘Download preset’ and move them to your \game folder.
ReShade will not always detect the downloaded preset by default. You may have to generate a new preset in game with ReShade, to do that, click the ‘+’ sign in the overlay to name a new preset, enable and disable any effect to simply have it generate a file in your \game folder, then go back to the \game folder and copy the entirety of the contents of the downloaded preset into the file you just generated. Back in the in-game ReShade overlay, your new preset should now have all the settings of the downloaded preset (more detailed walkthrough in the video).
Note: Adding a text file preset will require a full reload. Sometimes text files will be imported automatically by ReShade, though this may not always work, in which case convert them to .ini as shown in the video.
Step 7 - Removal/Uninstallation
To remove ReShade, find the screenshot you took in step 2 point 1. Go to the \game folder, and simply remove any excess files and folders that were not present in your screenshot.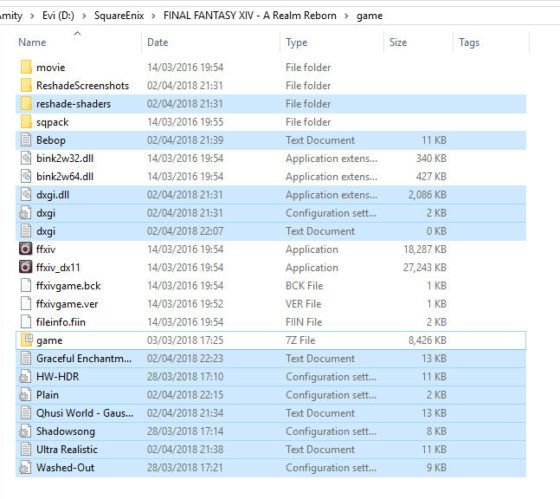
Step 8 - Back Up
Always back up any presets you make. I have a dedicated folder in Dropbox which I frequently update with my currently ReShade related files. Dropbox is a free online storage solution and can be accessed from multiple devices. Alternatives could be Google Drive or an external HDD.
Basic Image Guide
Updating ReShade
If you wish to update your installation from 3.0 to 3.1, old ReShade install files (not including your presets) must be removed before a new install will work. Please see Step 7 of the article guide for removal advice, then follow the normal install process. Remember, always screenshot or photograph your game directory before you make any changes and backup your files.
Note: If you use self-created presets I would be disinclined to update from 3.0 to 3.1 before asking someone that has 3.1 to test your preset file for you to make sure it works properly. Some of the shader options differ in 3.1 to 3.0 and the filter may not look the same.
Disclaimers
Sadly this guide cannot cover all eventualities and in some computer systems, the steps I have described here will not work. I’ve performed several remote installs using the method in this guide and all have worked. That doesn’t mean to say that every single install will work. Operating system and admin privileges can also impact on whether an install will work or not.
I am not an expert! When I first saw some ReShade screenshots I really wished to install the program, so I downloaded it and tried to install it, but for some reason, it just would not work. This guide is intended to pass on what I have learned to those who may find the install process daunting, confusing, or found themselves in a similar situation to me where the install wouldn’t work.
FAQ & Bugs
Will Using ReShade Get You Banned or Break Your Terms of Service?
To answer this I looked at a number of Reddit posts and forum threads. The most definitive answer I found was from Hvinire of the Square Enix community team:
Originally Posted by Hvinire:
Utilizing such a tool would not violate any agreements customers have with Square Enix, and we don’t plan on doing anything to restrict users from accessing it.However, we advise that players use this at their own risk. Square Enix does not regulate the content of the aforementioned add-on and will not be responsible for any damage or losses resulting from its use.
Obviously, I will echo the words above and state that using ReShade is at your own risk. I have, as yet, had absolutely no problems with running ReShade alongside Final Fantasy XIV; although it did cause a couple of crashes with World of Warcraft.
Does this impact on performance?
Yes, your FPS will drop and the post-processing will put a strain on your graphics card (depending on filters used). I recommend creating a ‘Plain’ config file, which I have explained in the guide. Playing with live effects is not recommended, however, there is a 'Performance mode' in the settings. The performance values can be viewed in the statistics tab after install.

For the additional bug mentions I cannot claim credit for all solutions, this has been a combined effort with those in the FFXIV community and the contributors are mentioned below. Should anyone point me in the direction of further bug fixes, or I learn further solutions over time, I will try to keep this section updated.
“I opened the game, created a new preset in the ReShade interface and then none of my settings saved”:
The most likely culprit is that the folder does not have read/write administration rights. Before you start creating an epic preset please check the reference by generating a new preset using the ‘+’ on the ReShade interface in game, toggle one of the shader options on and off. Navigate to your /game folder, and check for a new .ini file which will contain configuration text if successful.
Japanese text DX11 Error:
 This error has been cropping up, even with EU/US installs. For some reason unknown to me but likely explained in this Reddit post, the ReShade install busted something with the DX11 file connections. I found one workaround that is imperfect and was passed on another fix by @lcehearted which appeared on Reddit.
My solution: Slower method and requires you to use DX9 if you wish to use ReShade.
Personally, during the creation of this guide, I managed to cause this error by accident during repeated installs/removal of different versions of ReShade. This occurred when trying to use Direc3D 10+ with the DX11 install. So, I just went back to using the Direct3D 9 option again paired with the DX11. If this doesn’t work, pair the DX9 (“game/ffxiv.exe”) with the Direct3D 9 during install and change the launcher settings to launch the DX9 version for the game. This is obviously not ideal but if you’ve tried everything, something is better than nothing!
Reddit: Here is the Reddit discussion thread on this subject where various solutions are discussed. Credit to @lcehearted for forwarding me this link.
Adaptive Fog not working:
This error seems to be network-based and so does not affect everyone in the same way but it is worth a mention either way.
Disclaimer: Some reported the solution below to work with this problem, yet when I tested it, the fix caused my filters to become unstable, so I quickly switched back to default.
Solution: Go to settings, and change the preprocessor value for reverse from 1 to 0.
Credit to @EZ_Resanoca for providing the link to the original Reddit post that mentions this issue.
Flickering DoF & MXAO
“If you're having ReShade problems with DoF and MXAO flickering on and off, replace the dxgi.dll file in your install locations /game folder. Click here to download the file. It's plucked from Stormshade and works perfectly.” Credit to Lucille for this solution.
"My Folder will not deselect Read-only":
Some confuse the square icon with the tick icon in the attributes toggle for read/write privileges on the folder. Due to windows hardlinking/file types/NTFS partitions, you are unable to remove this toggle completely. The tick symbolizes that you may not make changes, the square allows some changes within the folder and a blank square allows full modification rights. So, don’t worry too much if you can’t get rid of the square.
As with most bugs, my ‘not being an expert’ title comes into play but If you have a bug or error that I have not encountered or mentioned in this guide then I would suggest visiting Reddit as they often have the solutions to current errors.
"I cannot remove the effect toggle keybindings.":
Navigate to the specified .ini file and open it. At the top, there will be a list of keys associated with the shaders. Either set the value that is not 0 to 0 or edit out the hotkeys (backup the .ini first before you change anything!). Resolved with Kirsi.
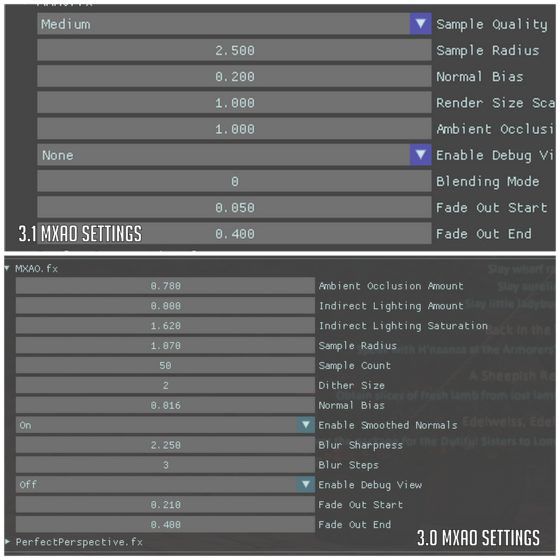
"I have upgraded to ReShade 3.1 from 3.0 and my filters don't look the same!":
Some of the shader options for 3.1 have changed so the .ini files do not import properly. As you can see in the screenshot below, the settings for MXAO are more extensive in 3.0 than in 3.1. I would recommend sourcing an earlier version of the MXAO.fx shader and replacing that in your shaders file.
Click here for the main common ReShade issues thread.
This post is very long but provides an incredible resource of information.
Preset Example Downloads
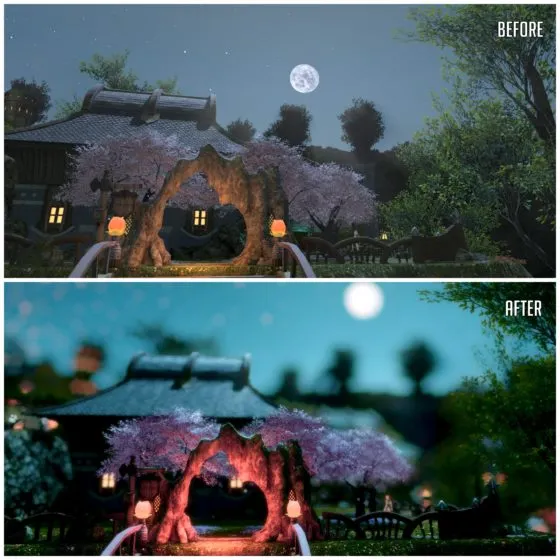
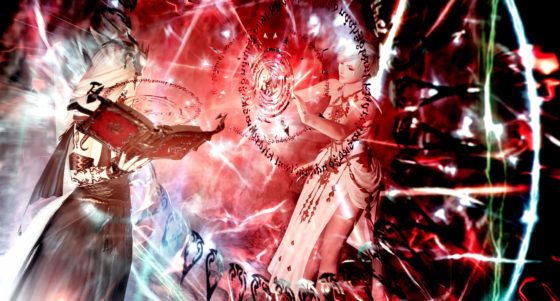
Below you can find a couple of useful presets downloaded from the library site. Some example images are shown below.
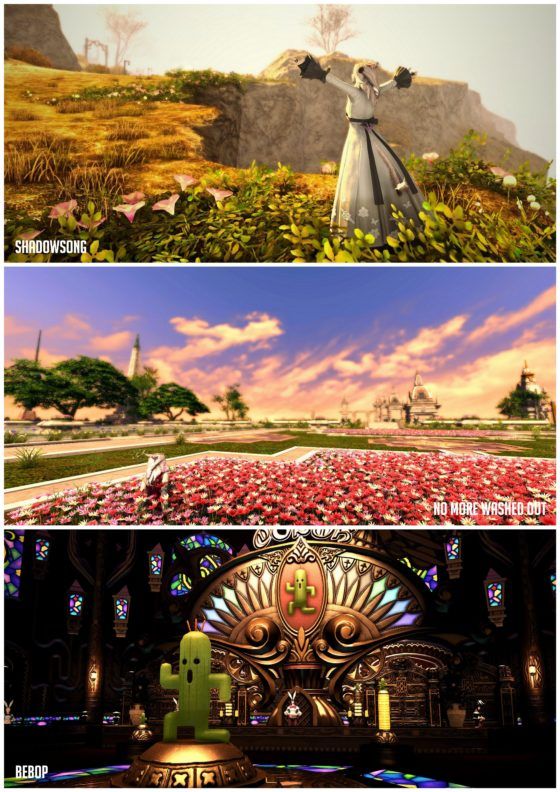
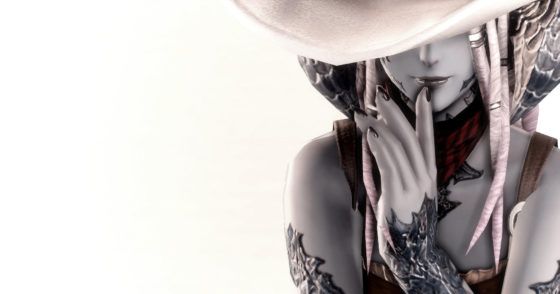
Shadowsong Portrait
Created by NightmareCandle
Very nice portrait filter for both studio shots and outdoor portraits.
No More Washed Out Colors
Created by NightmareCandle
Very simple filter to lightly enhance colors.
Bebop
Created by Foxbebop00
Works well in low light with bright color lighting sources.
Reshade Settings Guide
For an in-depth guide to ReShade settings please click the image below.

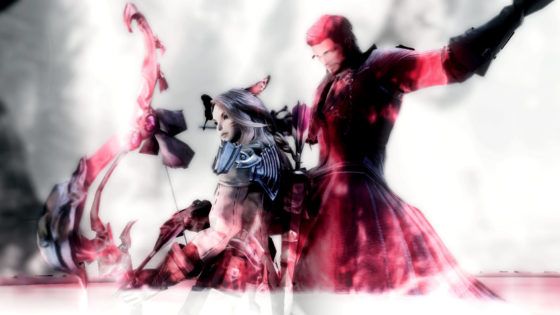
[caption id="attachment_216780" align="aligncenter" width="560"]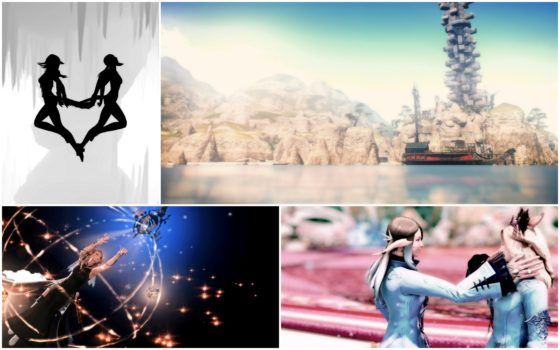 Other filter examples.[/caption]
Final Thoughts
For previous articles regarding screenshot art, please see my GPose Tutorials below. Adding what we’ve already learned in the GPose guides to ReShade can really enhance the image, so have a play and let me know how you get on!
Thank you for reading this guide! I hope that it has been concise, informative and some use if you were here seeking some assistance with ReShade.
I can’t express how much I am in love with this tool, the photographic possibilities now seem endless (if you have the time). If you have any questions, advice or comments please don’t hesitate to get in contact either through here, Screenographic or Twitter.