
As promised, the Season of the Dragon has continued in full force with the Scalebreaker DLC featuring two new incredible dungeons: The Azure Blight and Moongrave Fane
Normally, I only get a chance to review one of the dungeons in new DLC packs but this time I went ahead and did both – I was not disappointed. I started a little backward by going to the Lair of Maarselok instead of Moongrave Fane, and if you want to get there, you’ll need to travel to Grahtwood which sits on the southernmost tip of Elsweyr. Once you enter you’ll find the dungeon conveniently located on the other side of a creek within a small cave opening.

The Azure Blight – Getting Through the Dungeon
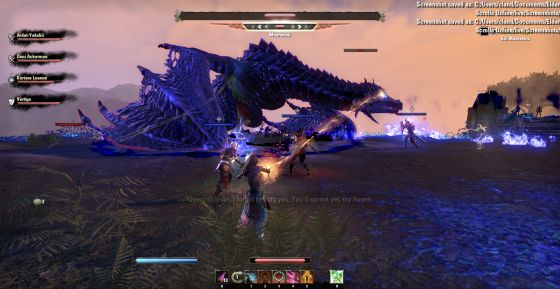
Once you enter the Azure Blight you’ll be greeted by Allanwen, who tells you all about the dragon blight and what you need to do in order to stop it. The dragon, Maarsolek is sitting on the other side of the mountain and it’s up to you to put him down. To aid in this endeavor, Allanwen will be enlisting the help of Selene, the nature spirit to protect Valenwood from Maarselok’s poison. Interestingly enough, the dungeon kicks off with a fight against Selene, and she packs quite a punch. The interesting thing about this boss fight is that you cannot directly attack Selene, but she can target you all she wants. Throughout the fight she summons a shade, bear, and spider, in addition to firing a poison spray.
The fight with Selene sets a trend as the rest of the bosses in the dungeon are indirect fights as well. Take the second boss, Maarselok himself as your first example, he casts blight and forces you to fight an azureblight lurcher, which you need to kill three times. You do not actually face Maarselok directly until the final, epic fight which involves a wide open area and lots of aerial bombardment.
Moongrave Fane – Freeing a Dragon
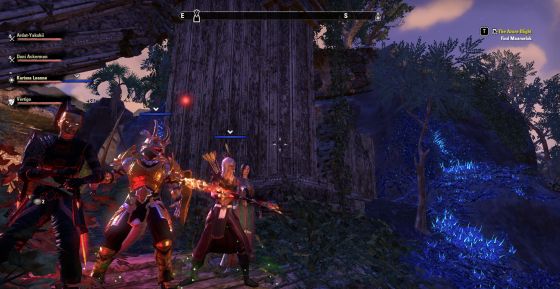
Because this is the Elder Scrolls universe we were bound to come across a scenario where someone was literally holding a dragon hostage. I mean, you know how this universe is. Once inside, you’ll stand alongside Chevalier Renald who seeks to take down the Hollowfangs before it’s too late. As you enter the dungeon you will start by talking to Chevalier, which is a normal start for any dungeon, but then it starts to get strange. The developers have introduced Tomb-Raider type mechanics that many find irritating. In particular, a series of crates that need to be pushed onto pressure plates in order to open gates and activate other parts of the dungeon. When I played through with my guild, they informed me that the crates did in fact play a role in the final boss fight of the dungeon, but it was so irritating that they simply ignored the mechanic and found a more direct way of defeating the boss.
On the subject of bosses, you start with Risen Ruins who utilizes shields and can only be defeated when you attack the pools of blood around him. Other bosses include Dro'Zakar and Kujo Kethba, which brings the boxes into play. The final boss of the dungeon, Grundwulf and Nisaazda were of particular interest to me because they were able to use the dragon shouts popularized by Skyrim, and let me tell you, it hurts to be on the other end of that.
A Visually Appealing DLC
One thing I absolutely couldn’t stop talking about as we pushed our way through the dungeon was the scenery; Zenimax has managed to outdo themselves with this one as the dungeons feature wide open spaces set against visceral and beautiful landscapes that practically invite you to stop and take a screenshot. I for one am glad that we’ve mostly gotten away from the cramped dungeon style that plagued early MMOs; the only problem is that if you are an easily distracted individual you might find yourself wandering off in a random direction rather than supporting your group.
Lore Heavy and Lots of Dragons
The introduction of dragons to this iteration of Tamriel has pleased many. After all, why would you come to a medieval setting like Tamriel unless you wanted to get into a fist fight with a dragon? Bringing them to both the open world and dungeons has made the game much more exciting and these two dungeons were particularly lore heavy. Rather than a typical smash and grab we got to learn a little bit more about the dragons and most importantly, how to defeat them.
If you want to jump into Scalebreaker, the basic DLC costs just 1500 crowns and delivers enough adventure to keep you busy as the Season of the Dragon continues.
Gameplay: 8/10
The game itself plays much the same as the rest of the Tamriel, but the introduction of the box mechanic is causing me to waver a bit in my positive feedback. It’s cool, no doubt, but there are two problems. First, it’s an overused mechanic that we’ve been seeing since the days of Sokoban and Tomb Raider. Second, the game engine really wasn’t designed for it, and throwing it into a boss fight as a mechanic was probably a poor decision.
Learning Curve: 9/10
If you’ve been playing ESO for any length of time then you already know how to do this, apart from the boxes. Keep in mind however that many of the fights are indirect, causing you to use strategy rather than brute force.
Graphics / Sound: 9/10
As I mentioned before in the review, this expansion is pretty. It’s really pretty. The backdrops are amazing, the attention to detail is incredible, the dialogue is impressive, top notch dragon visuals, and outstanding sound.
Value: 9/10
It’s some of the most fun I’ve had in an ESO dungeon in a long time, and for 1500 crowns, it’s a bargain like all the others. Keep in mind that ESO Plus subscribers will receive the DLC for free so long as they keep their sub up to date.
Overall: 8.5/10
Pros:
+Detailed Environments
+Lore Heavy
+Fun Boss Mechanics
Cons:
-Only Two Dungeons
-Box Mechanics can Get Annoying
