
Fang Lair is one of two new dungeons included in Elder Scrolls Online's latest DLC, Dragon Bones. The dungeon is found in the northeastern part of Bangkorai, but can also be reached through fast travel, traveling to a group member, or the dungeon group finder.
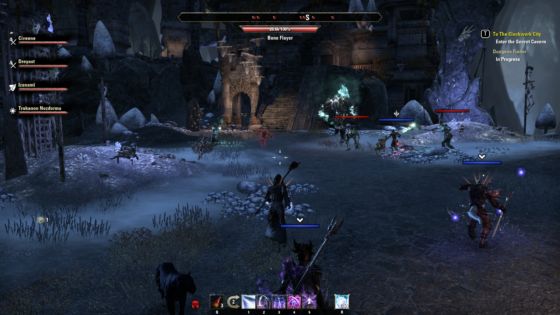 Plenty of undead mobs and necromancers fill Fang Lair.
The Basics
Like other dungeons in ESO, you can choose to play through Fang Lair in either normal or veteran mode, with a hard mode option in the veteran dungeon. On your first trip to either Fang Lair or the second new dungeon, Scalecaller Peak, you will earn the Renegade Dragon Priest Mask, a collectible hat.
Fang Lair is a Dwarven Ruin where a necromancer is performing a ritual to reanimate a skeletal dragon. Travel through the dungeon and stop these threats before it's too late.
Casting the Bones
[caption id="attachment_203141" align="aligncenter" width="560"]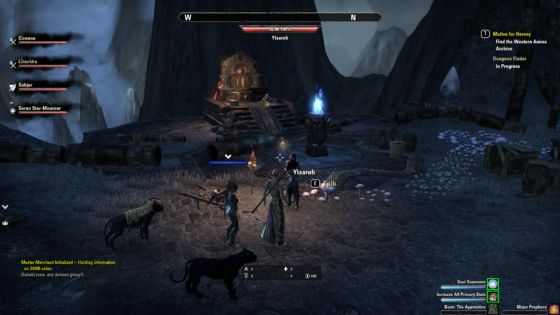 Find the NPC, Yisareh just inside the entrance to Fang Lair to begin the quest.[/caption]
You can pick up this quest in the dungeon from Yisareh. You can't miss her as she's just inside the entrance. She asks for your help with the necromancers who are bringing corpses into the ruins and making other ominous preparations. The way forward is barred to her by magic but with a group, you could probably force your way inside.
If you finish the conversation with Yisareh, she'll tell you that a necromancer named Lizabet is the one conjuring the magical barrier, but is probably not the one in charge. When you ask about the ruins, she will reveal that the Dwarves were driven from the place by a dragon, but that the monster must be long gone.
Navigating the Dungeon
[caption id="attachment_203142" align="aligncenter" width="560"]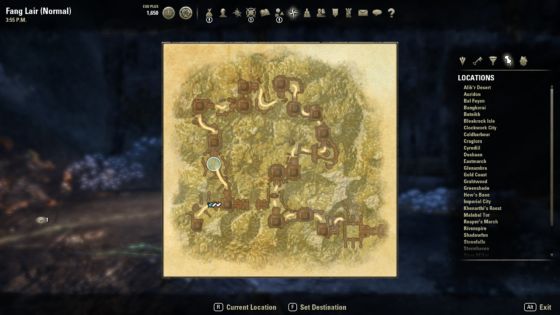 Follow the path in a clockwise direction through Fang Lair.[/caption]
Fang Lair is all on a single map level and is easy to navigate. Your group starts in the lower left corner and has to work your way around in a clockwise direction. The mobs are mostly undead and necromancers, and you will have to work your way through groups of them between five main boss fights. Bring your AOE attacks to help make quick work of these enemies and watch out for the Bone Colossus', as these guys have a particularly deadly attack.
You will see scattered round balls on the ground - these release poison spores if you stand near them for too long. If you keep moving through the dungeon quickly, they won't bother you much. Also - keep an eye out for chests, like in any dungeon.
[caption id="attachment_203146" align="aligncenter" width="560"]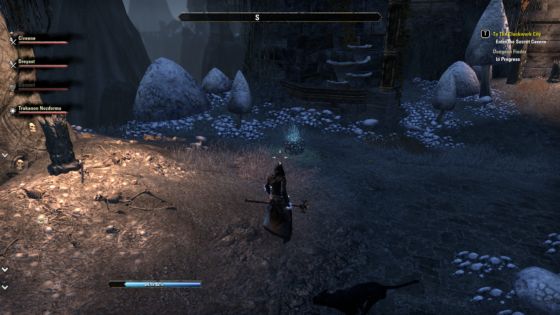 This ball will release poison if you stand near it for too long.[/caption]
The First Boss - Lizabet
Your first encounter with a boss is actually one of the easiest. Lizabet appears, taunts the group, and then summons some mobs to attack the party. You won't even engage her directly - simply dispatch the mobs she summons and you can move on. There isn't any particular strategy needed here.
The Second Boss - Cadaverous Bear
This is one of the more challenging fights in Fang Lair. When you arrive at this area, you will see a collection of animal statues. These come to life and you'll have to fight them, but the Cadaverous Bear is the main boss that has to be killed. It's essential to understand the mechanics of this fight, though, or you won't make it through.
[caption id="attachment_203149" align="aligncenter" width="560"]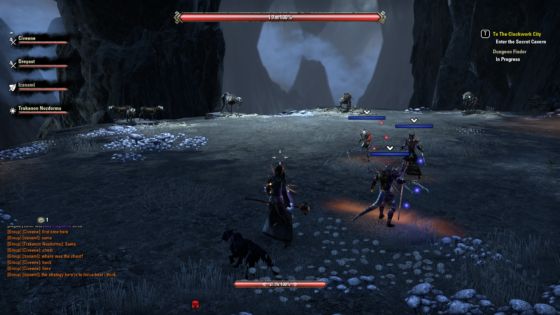 Starting position of the bosses. The wolves keep respawning from their position on the far left.[/caption]
Each of the monsters here has a different attack. The group of three wolves will run up to players and then explode. They respawn quickly and keep coming back throughout the fight so keep moving to avoid this damage or be ready to shield yourself and block their attack. The senche has a special attack where it will pin one player and cause damage. This attack has to be interrupted by another player, so keep an eye out for the message that pops up on the bottom of your screen to inform you of this.
The guar will spout poison fields, so just watch out for AOE and again, keep moving. Both the senche and the guar will respawn after a little time, so your main focus should be on the bear. However, have your tank taunt the mobs to all stay near the bear and use your AOE attacks to kill the senche and guar while DPSing the bear. If you defeat all the bear's minions, his shield will come up until they respawn. Once you defeat the bear, the fight is over.
[caption id="attachment_203151" align="aligncenter" width="560"]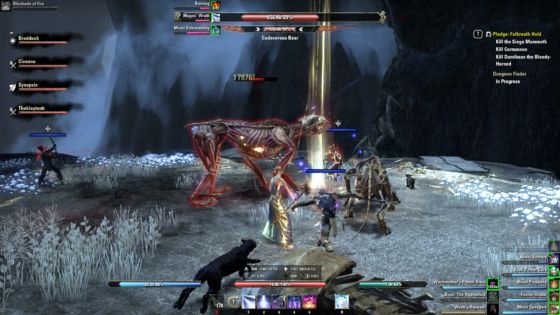 Focus on the Cadaverous Bear, but use AOE attacks to damage the bear's minions.[/caption]
If you're having trouble getting through this fight, focus on the senche first then take out the bear. Keep moving and kiting to avoid the wolves' explosive attacks.
The Third Boss - Caluurion
[caption id="attachment_203155" align="aligncenter" width="560"]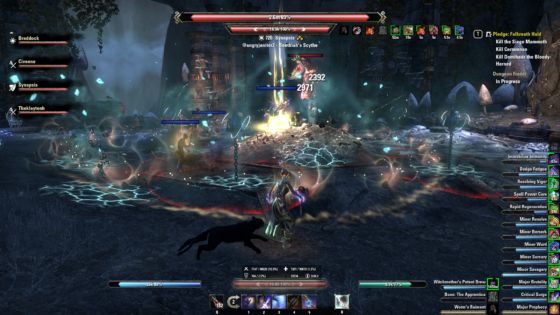 Stay alert and avoid Caluurion's AOE attacks.[/caption]
Caluurion is another necromancer boss, but your strategy here is fairly simple. He stays in the center of the room on top of a small hill. From there, Caluurion throws out a lot of AOE attacks, so pay particular attention not to get caught in overlapping circles from his attacks. Otherwise, at certain levels of health, he will activate one of several relics found on the periphery of the room. A message will show up on the bottom of your screen to inform you of this. Run to the correct relic and kill it as quickly as possible. While the relic is active, Caluurion is more resistant to damage.
[caption id="attachment_203156" align="aligncenter" width="560"]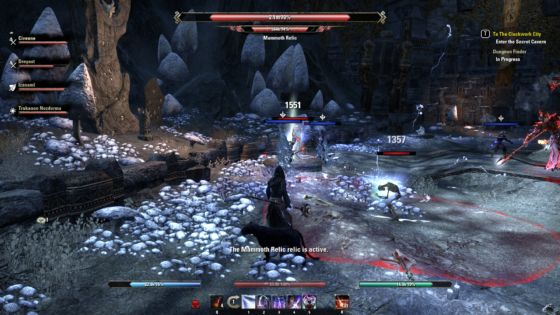 When a relic is active, kill it as quickly as possible.[/caption]
When you are attacking a relic, each one will generate different defenses (shock, poison, etc.). If a red ring forms around you, make sure not to overlap with a group member or you will accumulate extra damage. Once the relic is down, return to Caluurion. Alternatively, if your group has high DPS you may be able to ignore the totems and just take down Caluurion directly.
The Fourth Boss - Ulfnor
This boss is a mostly straight-forward fight. The only tricky part here is that he is accompanied by a ghost who will chain a random player. When you are chained, you won't be able to free yourself or do anything. The ghost pulls you closer, and if you end up next to her, then Ulfnor runs up and one-shot kills you. Your group members will need to kill the ghost before she pulls you in if you want to avoid certain death.
[caption id="attachment_203157" align="aligncenter" width="560"]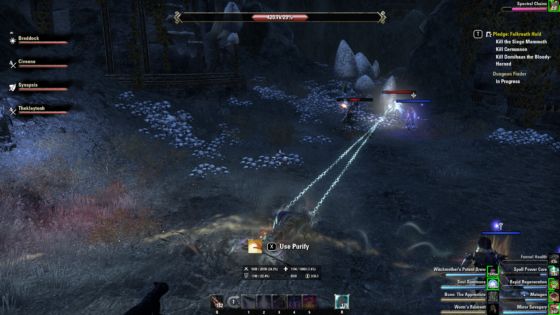 I'm chained by the ghost here and can't do anything until my group frees me.[/caption]
When fighting Ulfnor directly, watch out for his heavy attacks. He also uses a lot of fire - both a series of small circle AOEs that radiate out from him, as well as a collection of fireballs that shoot out and then bounce around the battlefield.
The Fifth Boss - Thurvokun
When you finally arrive at the end of Fang Lair, you'll discover that the necromancer Orryn the Black has managed to resurrect the dragon, Thurvokun. Your main fight here will be with Thurvokun, but Orryn triggers other aspects of the battle.
[caption id="attachment_203158" align="aligncenter" width="560"]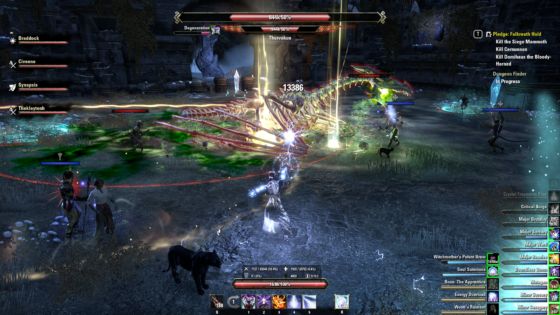 The dragon produces a large poison field (green).[/caption]
To start with, have your tank keep Thurvokun in the middle of the room. Throw your attacks at him and avoid his large poison AOE and ice attack that radiates from his tail. As his health decreases, crystals at the periphery of the room will become active and spawn additional mobs. Destroy the crystals quickly - there are four of them. Be careful if your group is doing massive damage to Thurvokun - you can inadvertently trigger multiple crystals at once and get overwhelmed by mobs.
The most deadly aspect of this boss fight happens next. Orryn will summon a line of ghosts that will run across the room. If they touch you, you will die. In order to avoid this, look for the friendly NPC who has been following you through the entire dungeon. He will create a yellow glowing barrier. Hide behind the barrier to stay safe from the ghosts. The wave of ghosts will keep repeating itself. If you're using a voice chat option, have someone call out when the ghosts appear to make sure everyone has time to shelter behind the barrier.
[caption id="attachment_203159" align="aligncenter" width="560"]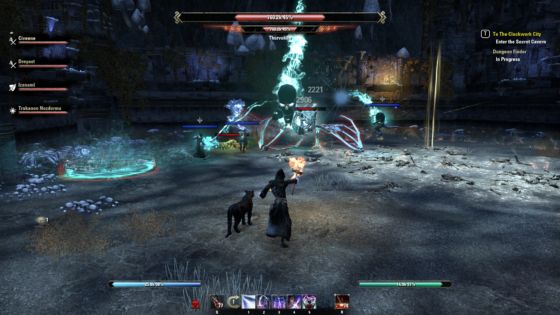 He throws skulls at you too.[/caption]
Once Thurvokun is down to zero health, guess what? Orryn will resurrect him and he'll be back at around 50% of his health. He'll continue his attacks while more mobs spawn from where the crystals had once been. Thurvokun will scream and cause fear. Break free from this, but pay attention. After the fear attack, the dragon will shoot poison balls that can kill with one shot. To avoid this damage, look for a gold circle on the floor. Run through the circle (one per player) and you'll be safe.
Hard Mode
If this all hasn't been enough of a challenge for you, try it again on Hard Mode. More mobs will spawn and Thurvokun will have more health. The crystals will spawn a bone colossus. Kill the crystal quickly, or a second colossus will join you. The wave of ghosts will change so that it no longer covers the entire width of the hall. However, you won't get the glowing yellow shield so you'll have to find the gap between the ghosts and make sure you get through that part.
Rewards
On completion of the battle, make sure you speak with Yisareh again to finish the quest and earn a skill point. You'll also win the Fang Lair Vanquisher achievement and the Thurvokun trophy.
[caption id="attachment_203162" align="aligncenter" width="560"]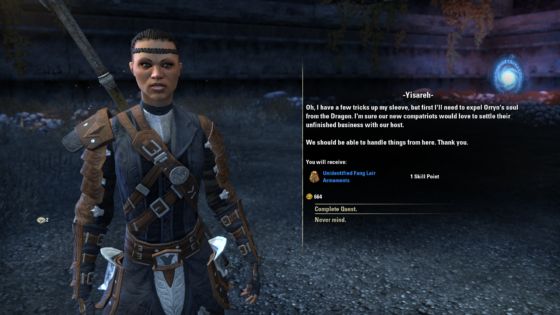 Speak to Yisareh for some well-earned rewards.[/caption]
As you've made your way through Fang Lair you will certainly have picked up some of the new set items. If you're working on a particular build, here are the stats on the four sets:
Thurvokun Set (monster set)
1 item: Adds XXXX maximum health
2 items: When a nearby enemy damages you, summon a growing pool of desecrated bile for 8 seconds. Enemies in the bile receive XXX Disease Damage every 1 second and are afflicted with Minor Main and Minor Defile, reducing their damage done and healing received by 15%. This effect can occur every 8 seconds.
Caluurion's Legacy Set (light armor)
2 items: Adds XXX Spell Critical
3 items: Adds XXX Spell Damage
4 items: Adds XXX Spell Critical
5 items: When you deal Critical Damage with a single target Magicka ability, you launch a Fire, Ice, Shock, or Disease ball at your target that deals XXXXX damage and applies a status effect. This effect can occur once every 10 seconds.
Trappings of Invigoration Set (medium armor)
2 items: Adds XXX Stamina Recovery
3 items: Adds XXXX Maximum Stamina
4 items: Adds XXX Stamina Recovery
5 items: When you cast an ability while under 33% Stamina, you restore XXXX Stamina. This effect can occur once every 1 minute.
Ulfnor's Favor Set (heavy armor)
2 items: Adds XXXX Maximum Health
3 items: Adds XXX Magicka Recovery
3 items: Adds XXX Stamina Recovery
4 items: Adds 4% Healing Taken
5 items: Increases the Magicka or Stamina your Heavy Attacks restore by 30%
You may notice that the Ulfnor's Favor set lists two separate bonuses for 3 items. I suspect this may be a bug, but since I play a lightly armored DPS sorcerer, I haven't tried out this set.
Overall, the Fang Lair dungeon seems to be more popular than the other new content - Scalecaller Peak. The boss battles are doable but challenging, depending on the abilities of the group you go in with.
